GL 55
Batch Composting Toilet
$1,099.00
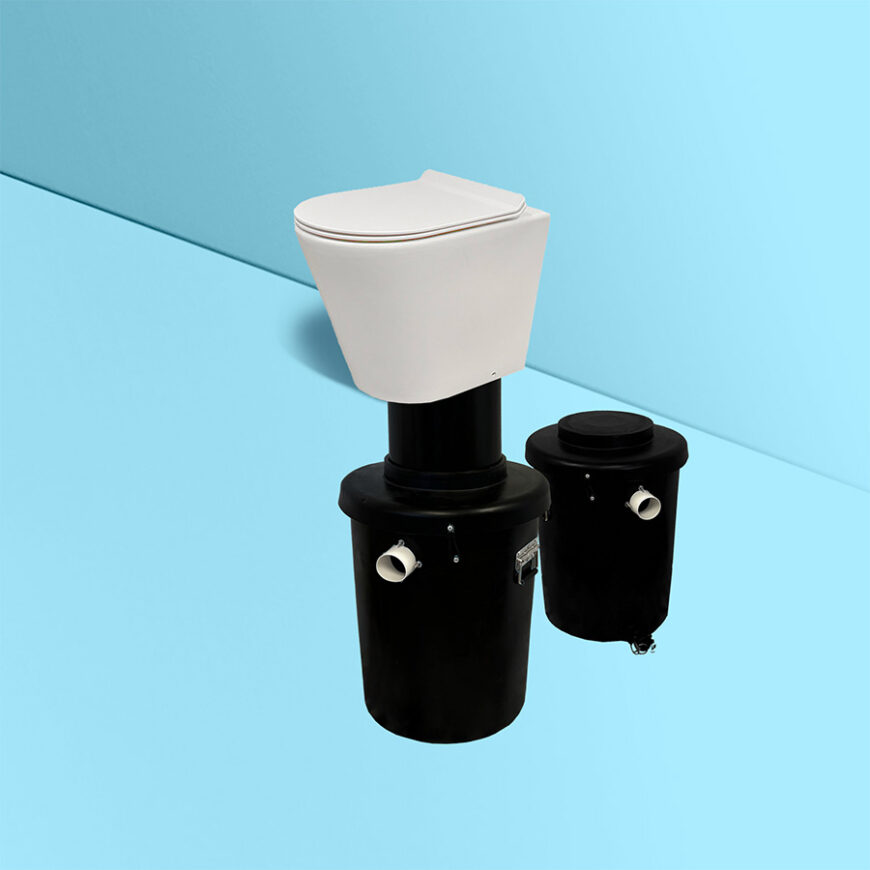
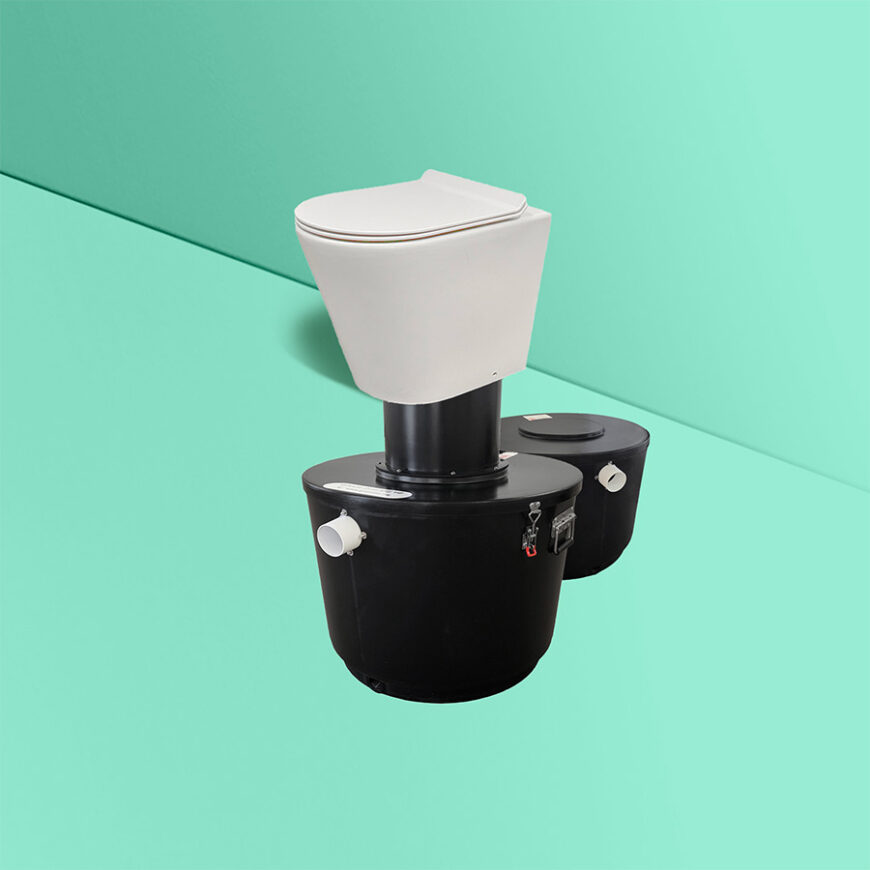
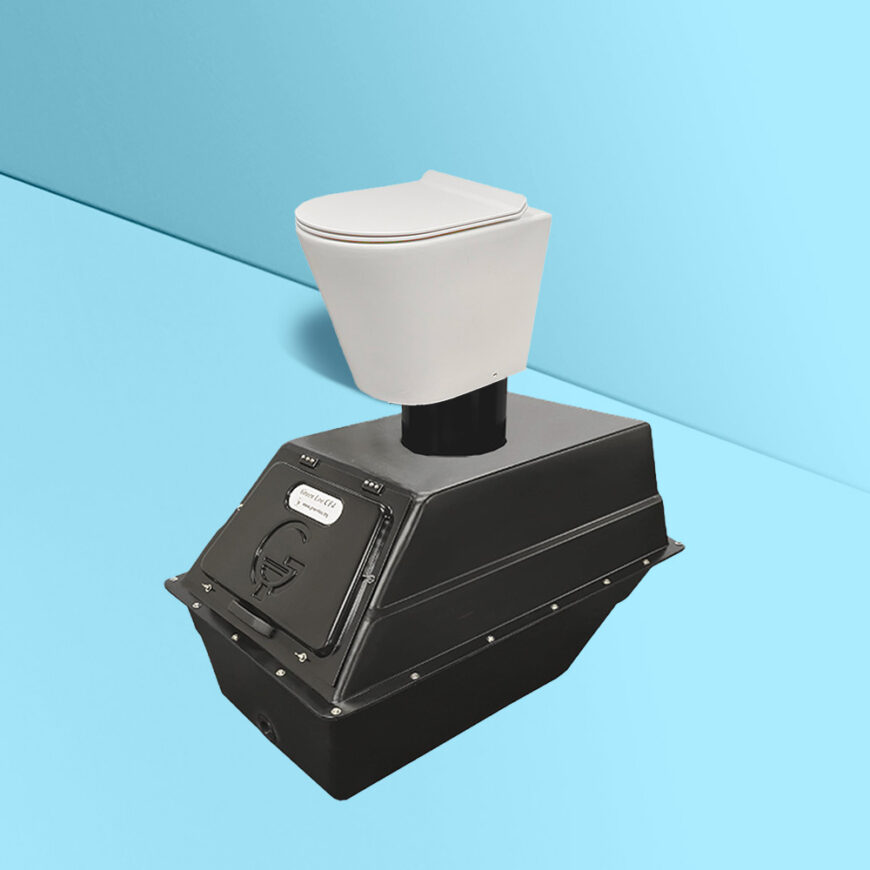
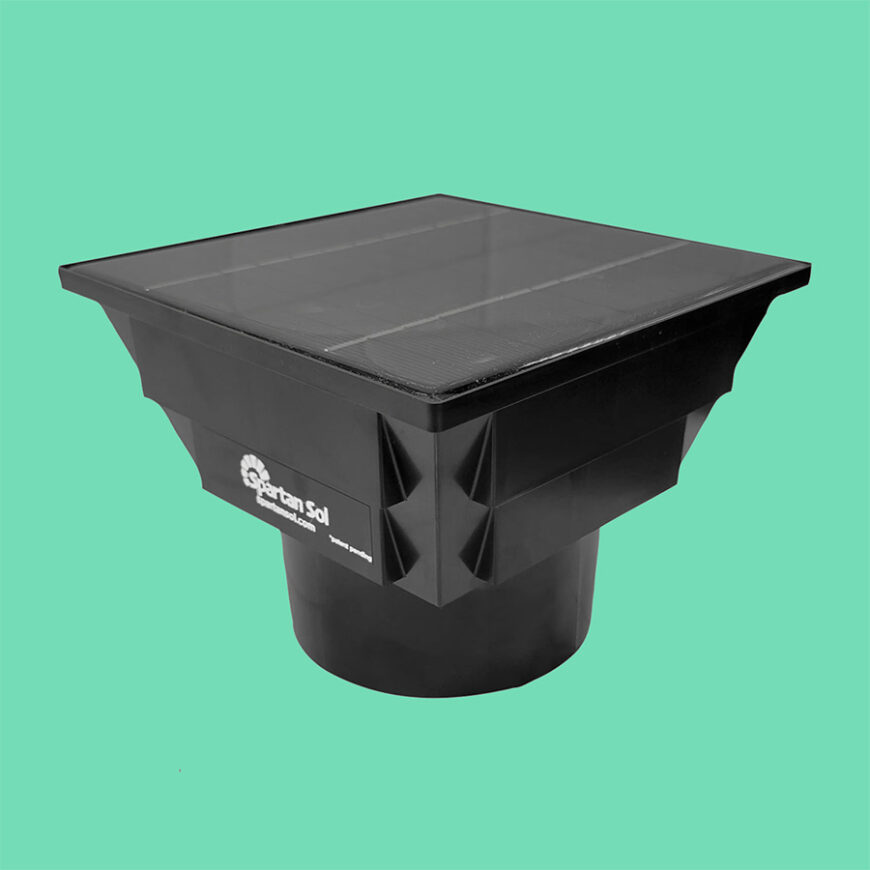
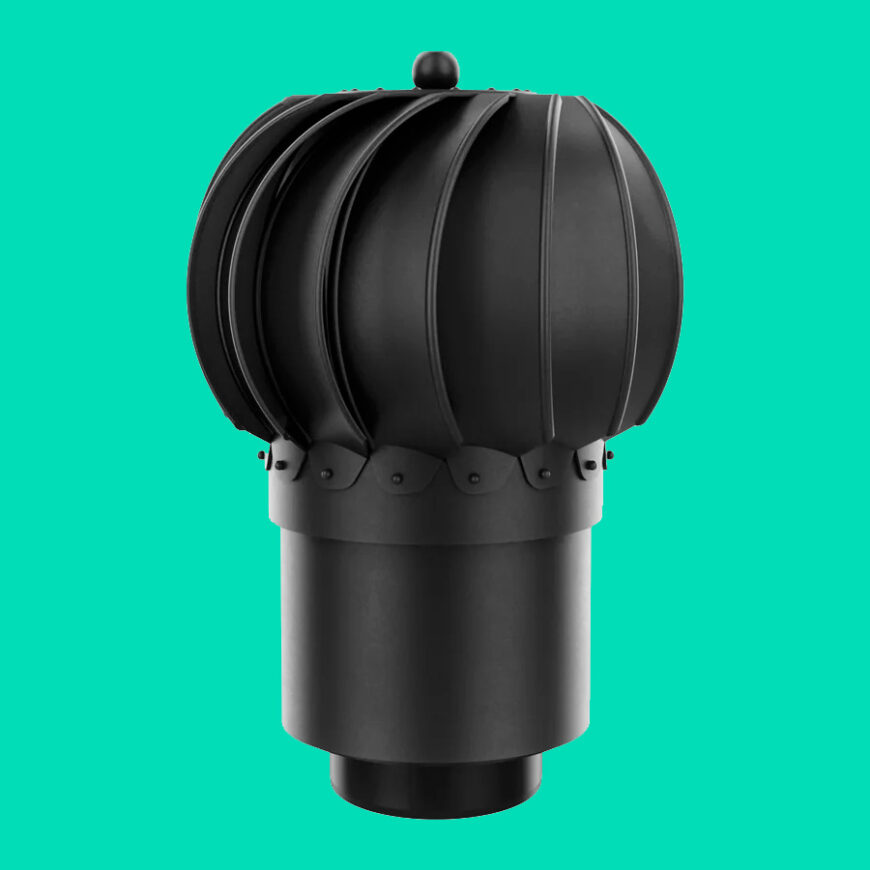
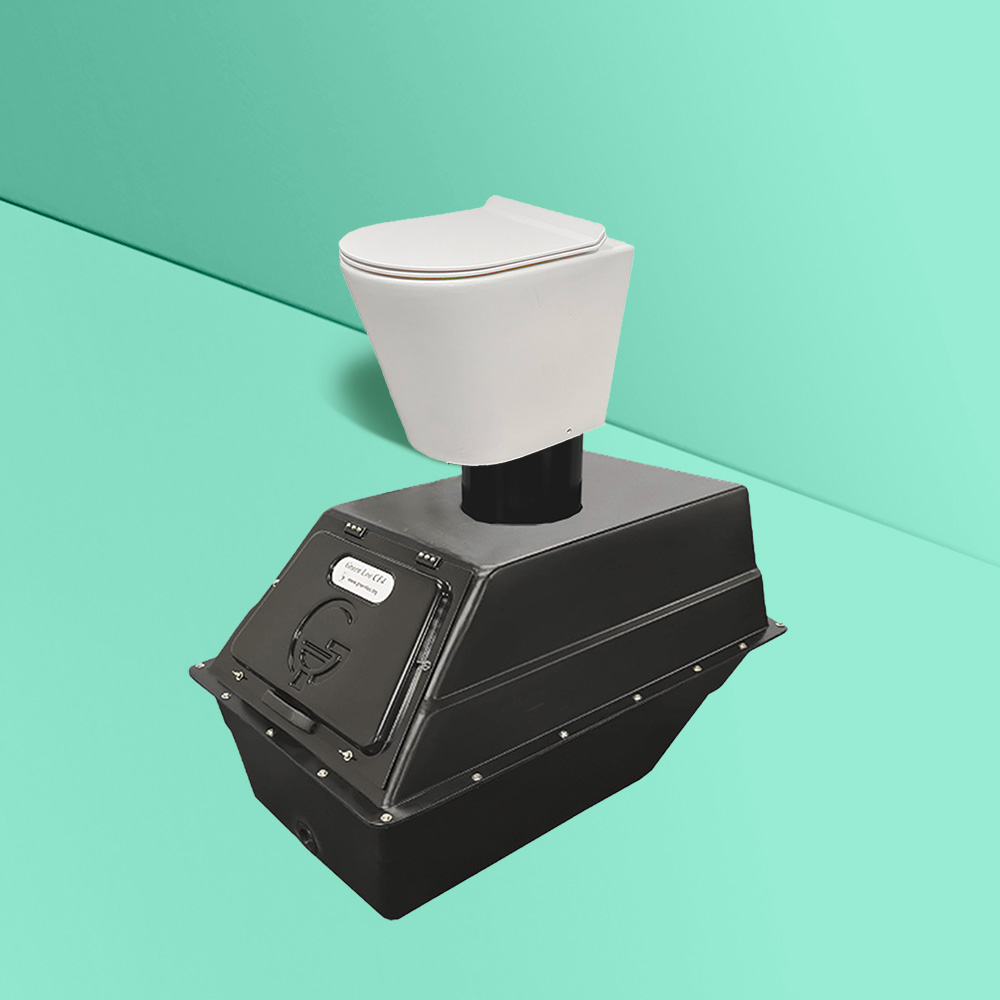
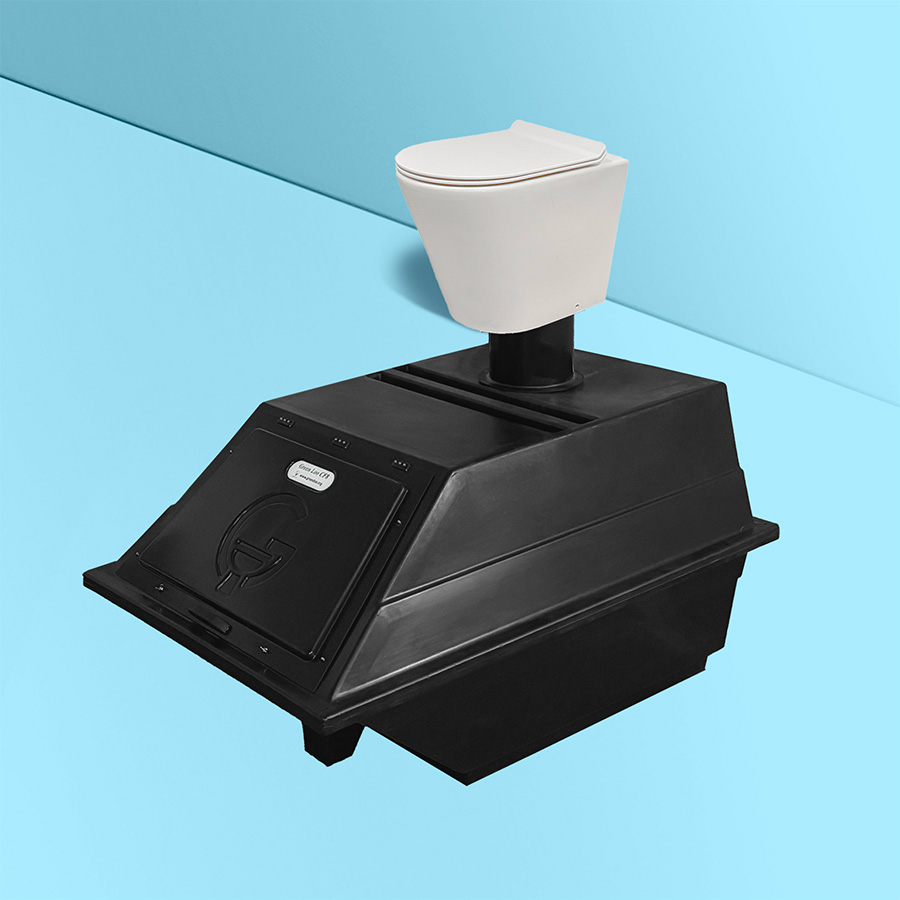
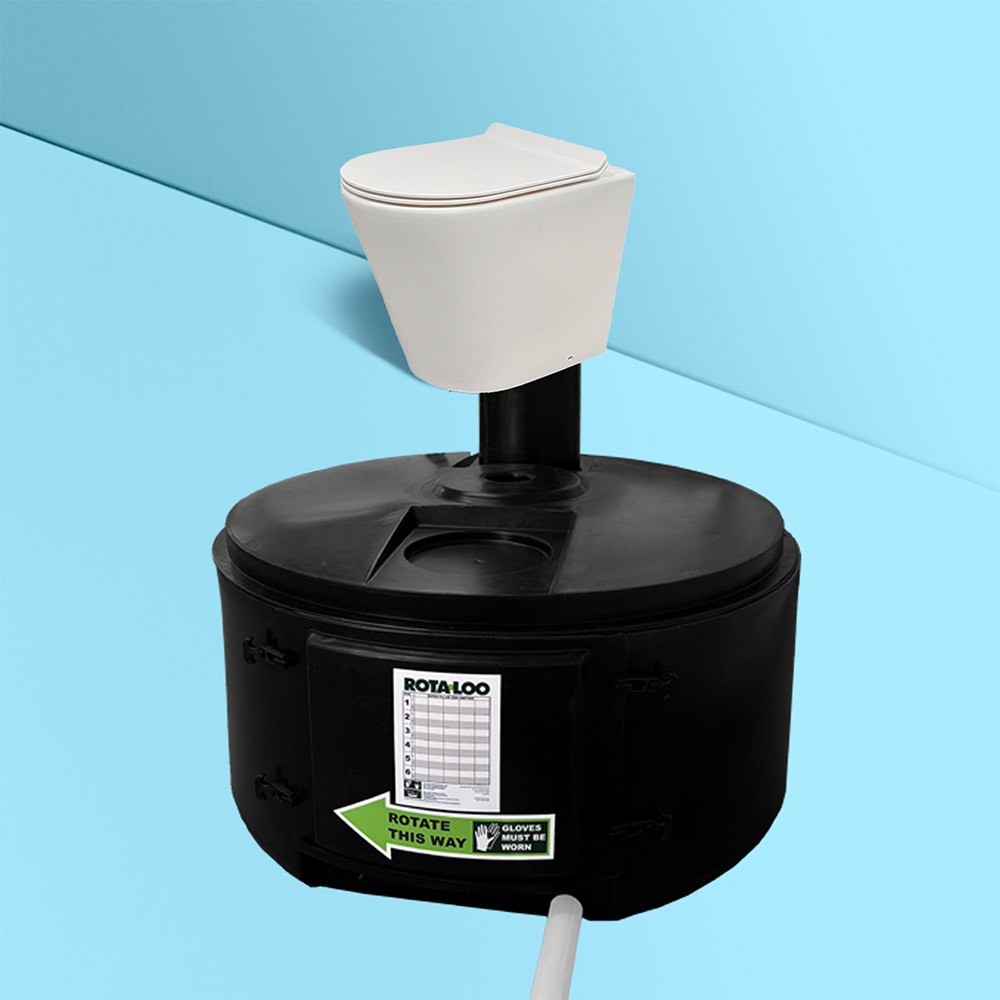
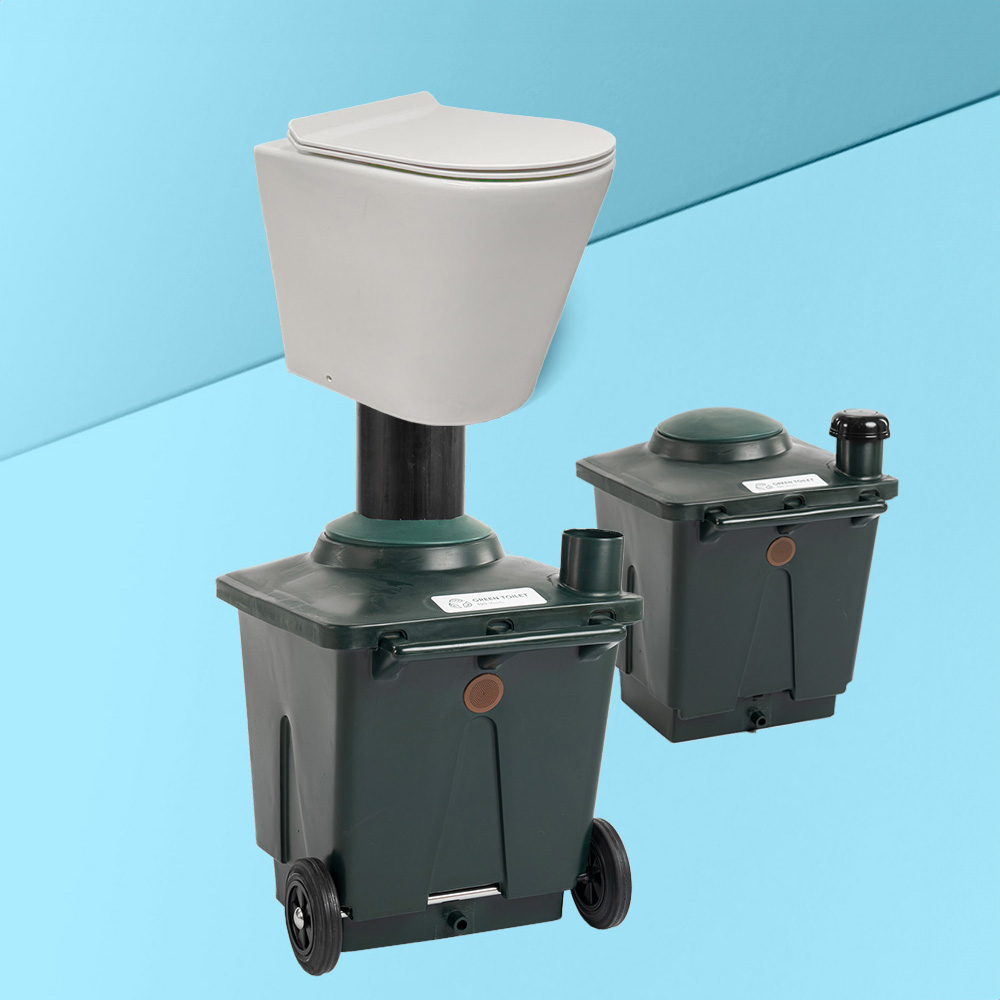
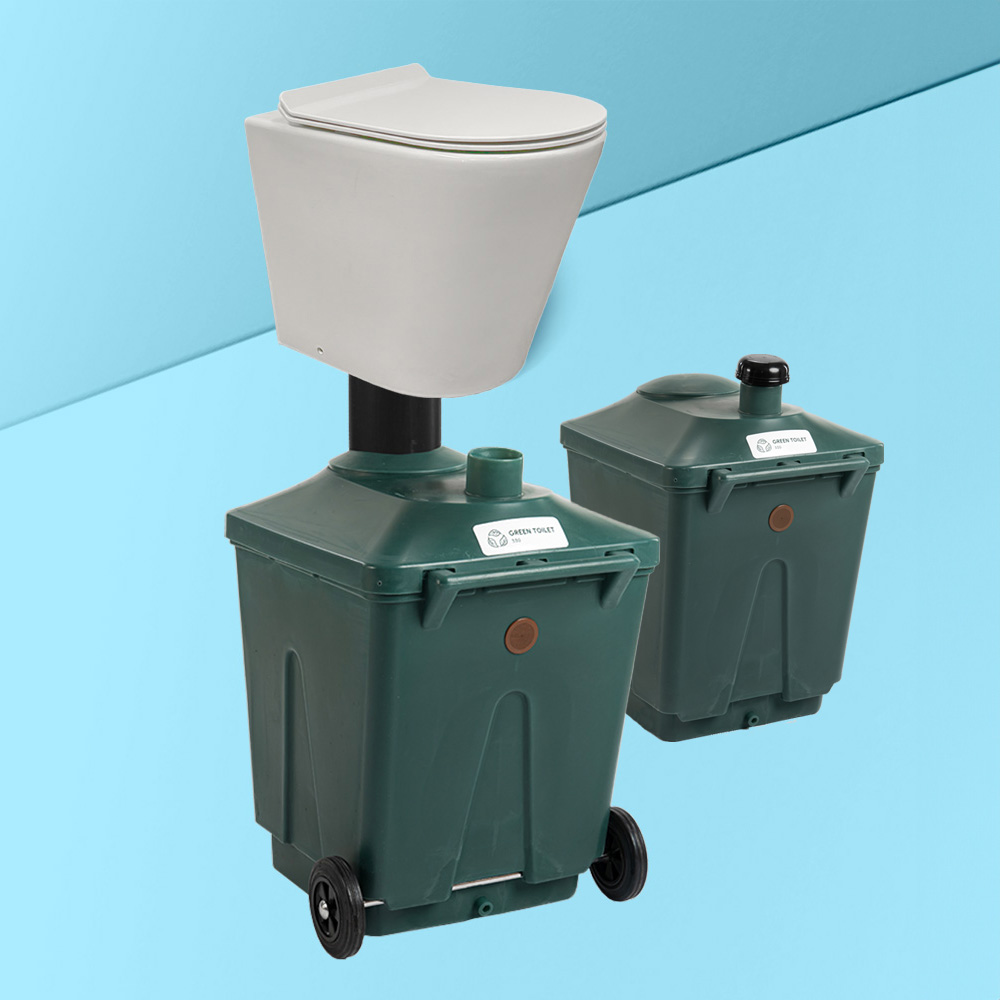
The GL 55 is the smallest and most affordable split-system batch composting toilet on the market. This waterless system features a sleek porcelain toilet pedestal and separates excess liquid within the composting containers. Ideal for weekenders, it supports 1-2 people full-time, 2-3 people part-time, or up to 4-5 people on weekends. The package includes two composting containers and all necessary supplies. It can be powered by a 12V fan, solar system, or a whirlybird for off-grid use.
Out of Stock. New stock expected to arrive in September 2025. Please consider the GL 90 as an alternative product.
🎉 $100 OFF – Pre-order Campaign
Order this product before July 31, 2025 and enjoy a special $200 discount as part of our pre-order campaign.
Estimated new stock arrival: September 2025*. Secure yours today!
*Delivery times are estimates and may vary due to shipping and customs processes. Learn more
22" Below clearance required
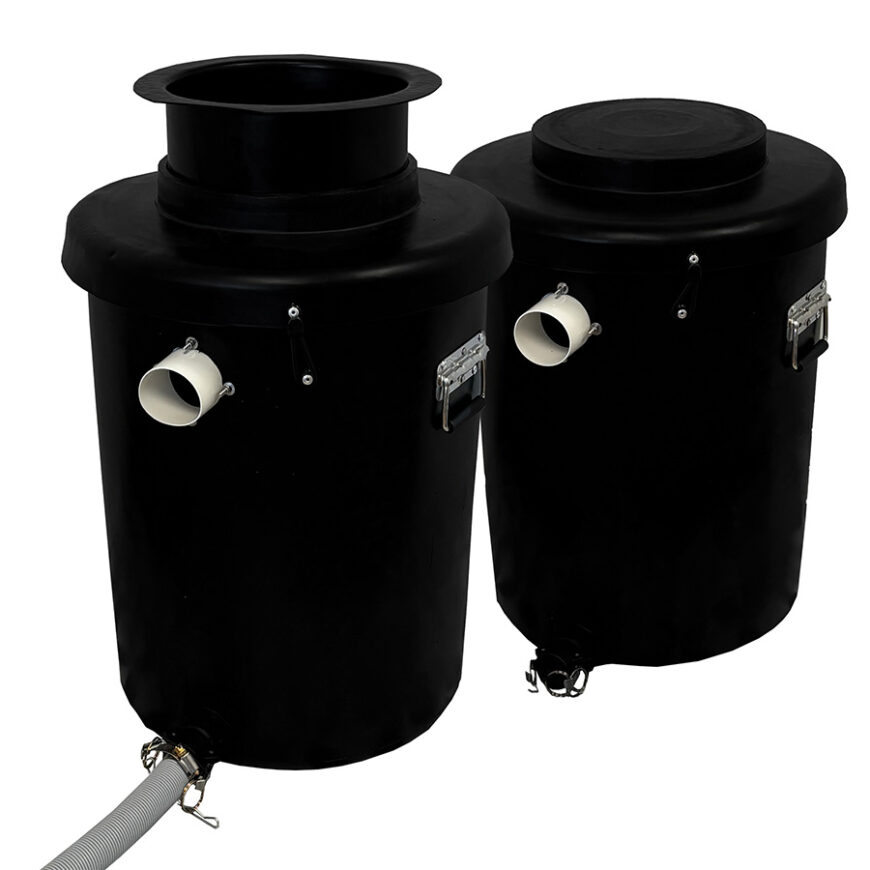
2 x Batch composting bins

Shipping from Nevada
GL 55
The GL 55 is the smallest and most affordable split-system batch composting toilet on the market, making it an ideal choice for tiny homes, cabins, and weekenders. With its sleek porcelain pedestal, this waterless toilet combines functionality and style, fitting seamlessly into any off-grid bathroom.
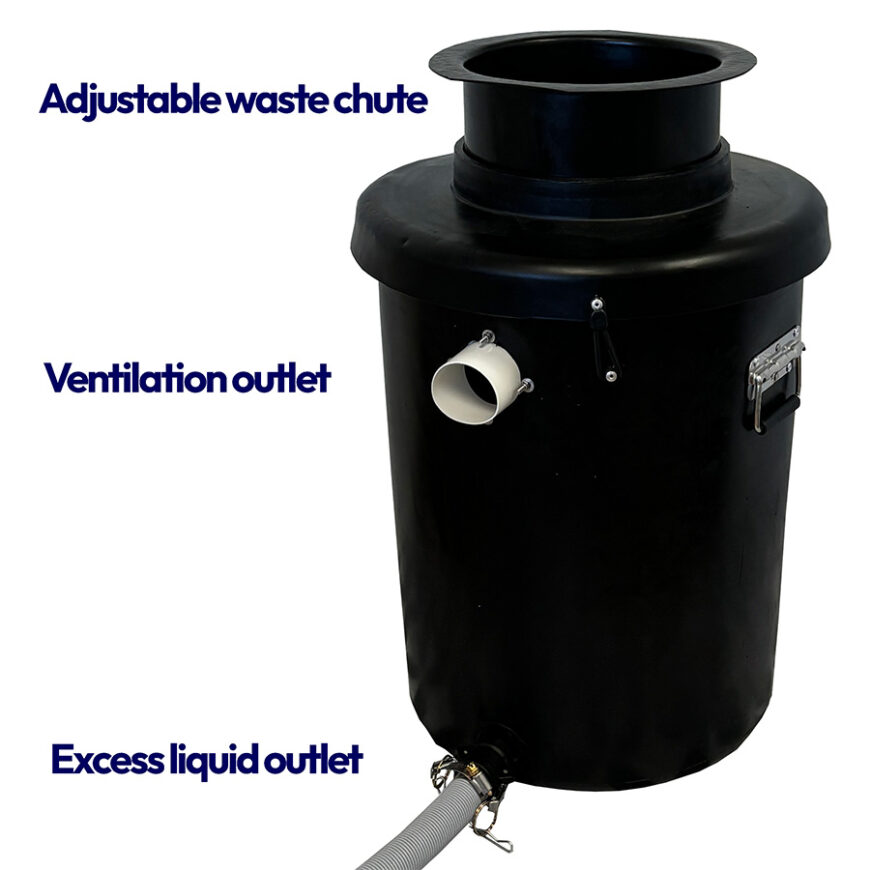
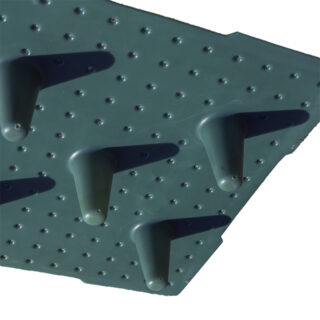
The system efficiently separates excess liquid at the base of the composting containers using a unique capillary tray design. This tray not only absorbs some of the liquid back into the compost, enhancing the composting process, but also minimizes maintenance by reducing the amount of liquid that needs to be managed. This advanced feature sets the GL 55 apart from urine-diverting toilets, offering a simpler and more streamlined solution for composting waste.
Perfect for Off-Grid and Sustainable Living
As a completely waterless toilet, the GL 55 requires no plumbing or chemicals, making it an environmentally friendly option for off-grid living. Its power-efficient 12V fan ensures odorless operation, and for locations without electricity, the system can be paired with a solar setup or a whirlybird ventilation system, offering total off-grid functionality.
The GL 55 is designed to feel as close as possible to a regular toilet, providing users with a familiar and comfortable experience. Waste falls directly into one of the composting containers located below the floor level, where the system efficiently separates excess liquid from solid waste using its capillary tray. This batch composting method ensures the toilet can be used continuously without interruption, as one container can be used while the other finishes the composting process.
To maintain an optimal composting environment, we recommend occasionally adding bulking materials such as hemp bedding, coconut coir, or peat moss. This can be done after each use when solids are deposited or in a larger amount once a week, depending on your preference.
Common Questions About Use
- How do I keep the porcelain pedestal clean?
The GL 55’s porcelain pedestal is designed to minimize contact with waste due to its shape and the natural anatomy of the user, meaning stains or marks are extremely rare. For cleaning, you can use a toilet brush and a small amount of water, such as from a spray bottle, just as you would with a regular flush toilet. - Can I throw toilet paper into the toilet?
Yes, standard toilet paper can be safely added to the composting container. Avoid using any paper products that contain plastic, as these will not compost and should be placed in a separate bin. - Does the toilet smell?
No, the GL 55 is completely odorless. This is achieved through its advanced design, which separates liquids from solids and uses a ventilation system that creates constant underpressure in the composting unit. Air is drawn up and out through the ventilation pipe, ensuring no unpleasant odors escape into the bathroom at any time. This is a key feature that addresses one of the most common concerns people have about composting toilets.
Installation of the GL 55 Composting Toilet
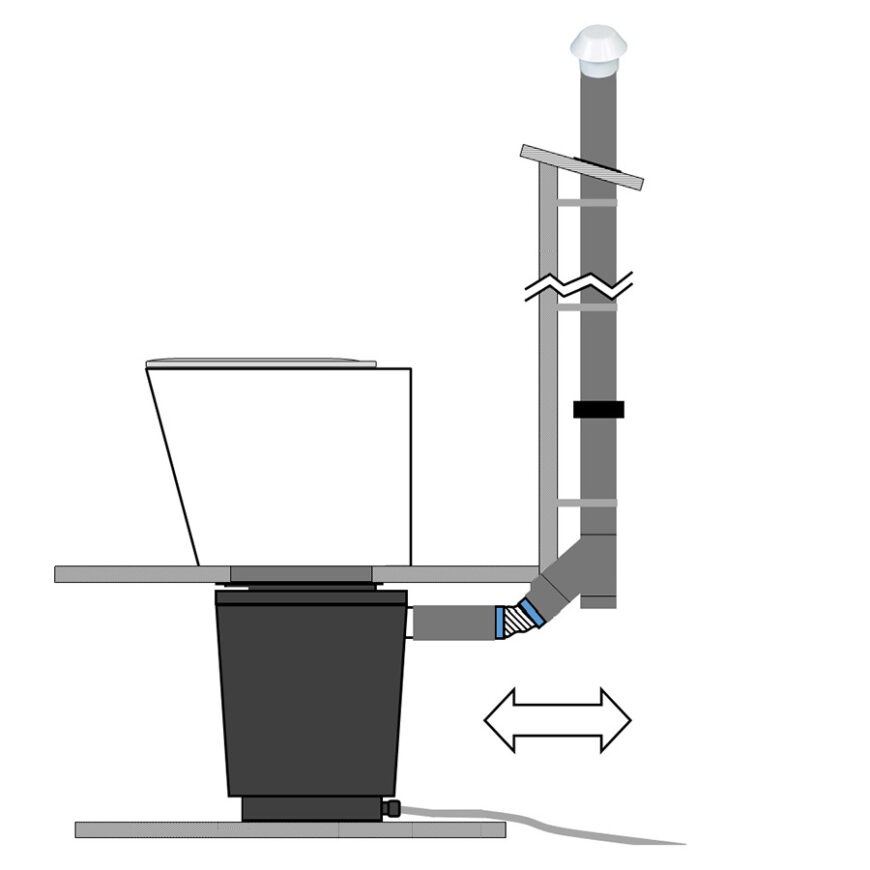
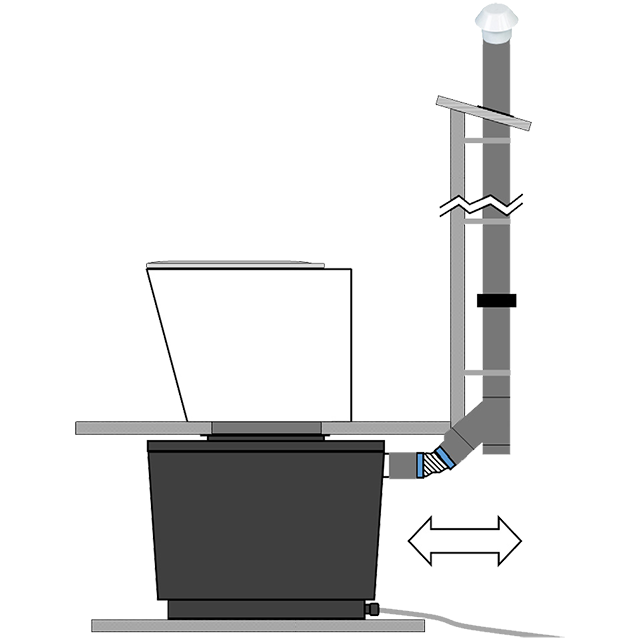
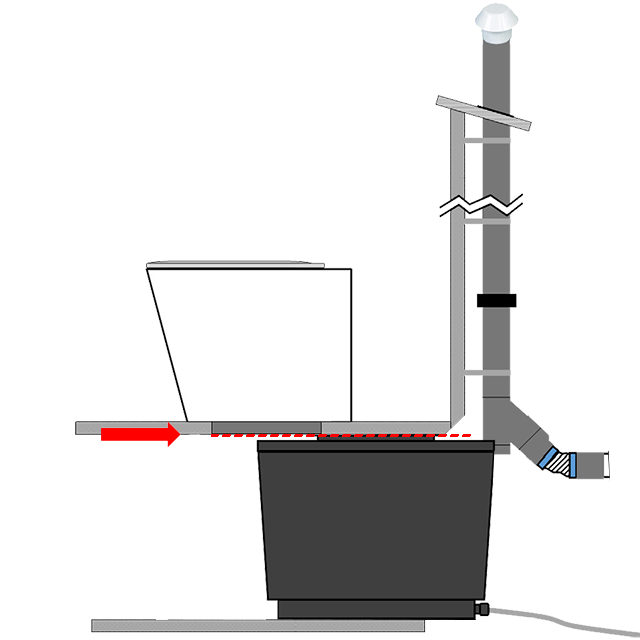
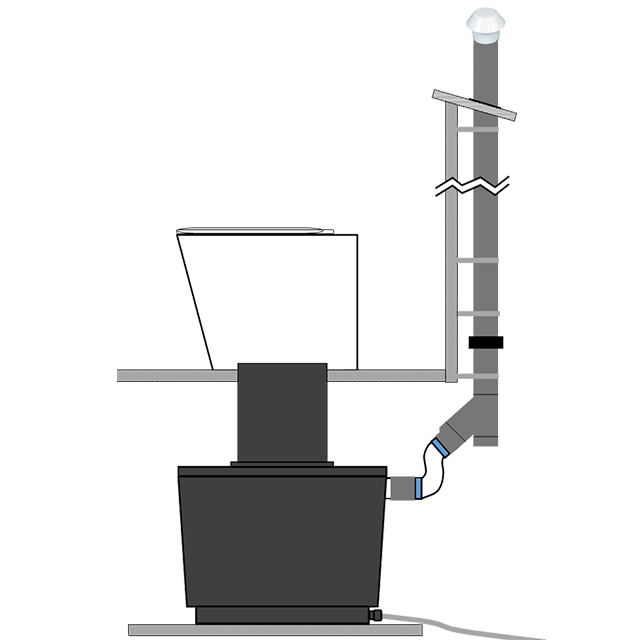
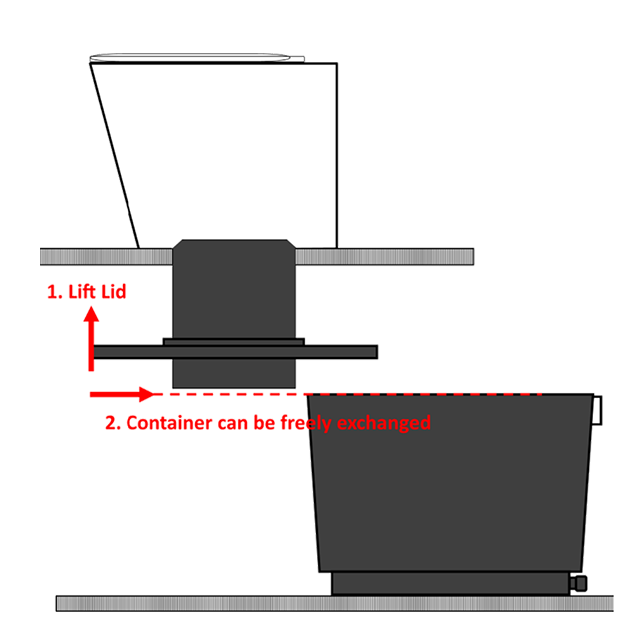
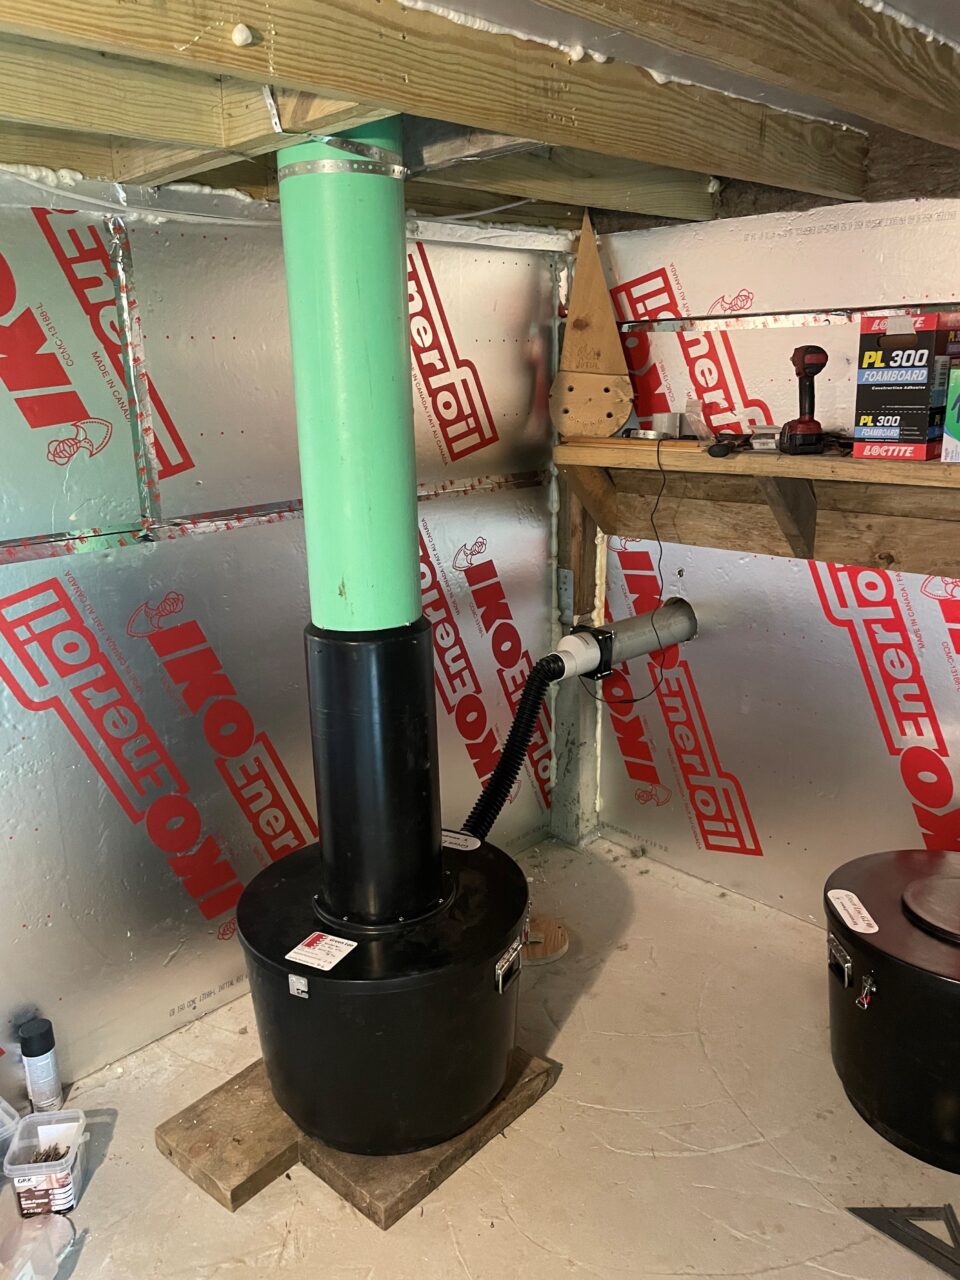
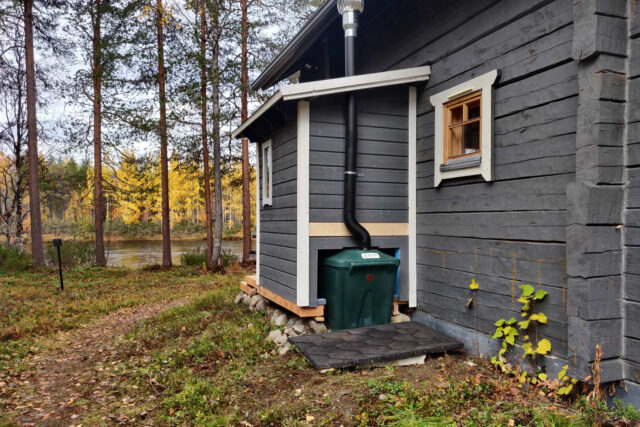
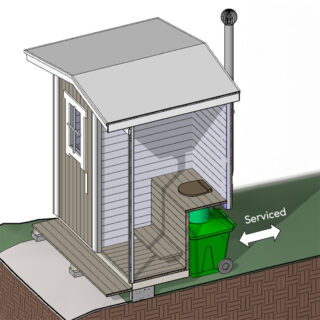
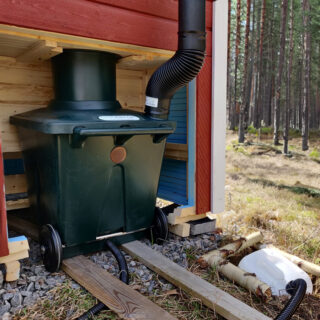
The GL 55 offers two main installation and servicing options, allowing for flexibility based on your bathroom setup and preferences. The composting containers are installed directly below the toilet pedestal, requiring a minimum underfloor clearance of 550mm (21.6 inches).
Installation Options:
- Option 1: Pull Out the Entire Container with the Waste Shaft and Lid
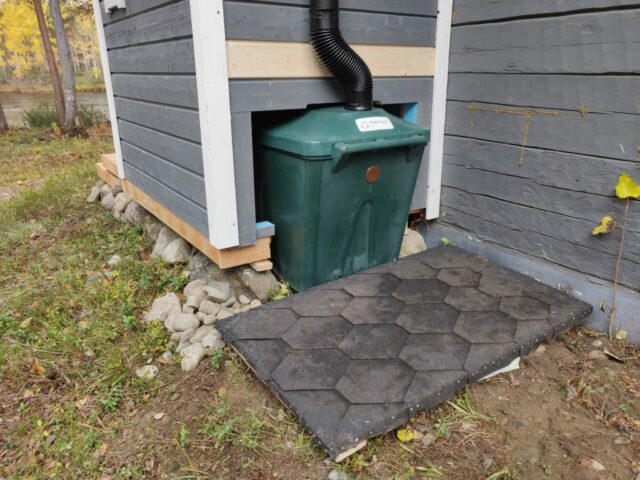
In this setup, the entire composting container is removed for servicing, including the lid and waste shaft. This method is ideal for spaces with more clearance and offers easy access for cleaning and maintenance.
- Option 2: Pull Out Just the Container
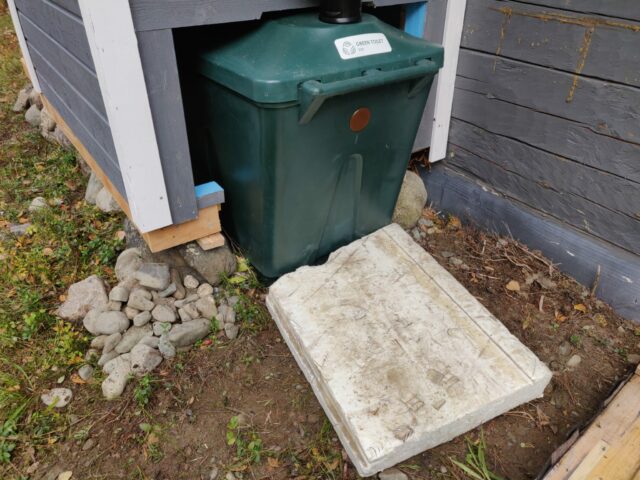
With this option, the waste shaft and lid remain in place, and only the composting container is removed for servicing. This method is more compact and is generally the more common choice, as it minimizes disturbance to the overall system.
Both options allow for straightforward installation and servicing of the GL 55, ensuring long-term ease of use.
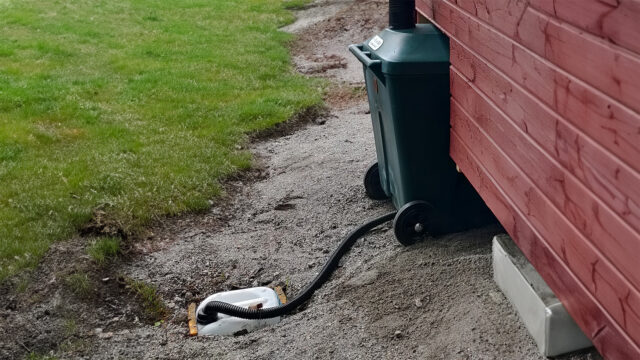
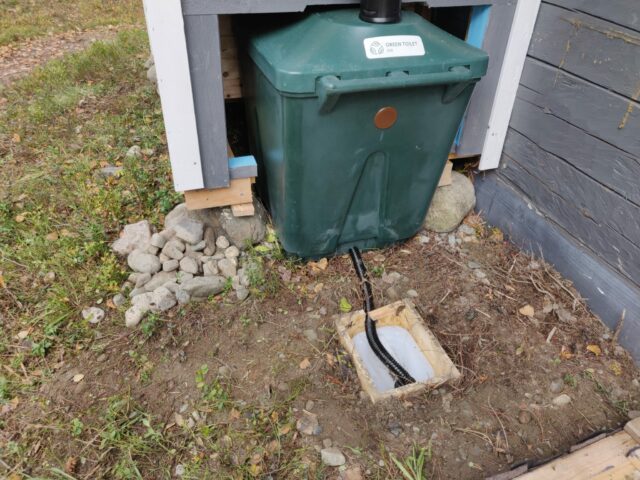
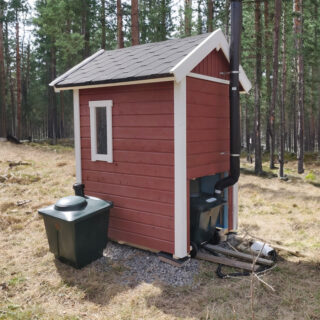
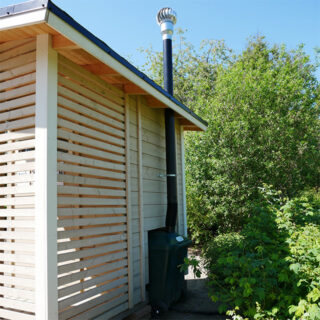
Note: The above installation photos are of the larger GL 90 system, but the same applies to the GL 55 as well.
Additional Installation Details:
- Ventilation: The system includes a 12V, 3-watt fan and vent fittings to maintain airflow and eliminate odors. For off-grid setups, the ventilation system can be paired with a solar-powered fan or a whirlybird. Please note that the standard delivery package does not include the rigid 4″ vent pipes.
- Drainage: Excess liquids are efficiently handled through a drainage hose, which can be directed to an appropriate disposal area such as a gravel pit.
The GL 55 is shipped with comprehensive installation instructions and all necessary components, ensuring a smooth setup process for any handyman or DIY enthusiast. The only product component you need to acquire from your local hardware store is the rigid vent pipes that are not part of the standard delivery package as every installation requires different lengths of vent pipes.
When the GL 55 composting container is full of solid waste, servicing the system is a quick and straightforward process:
- Remove the Full Container:
The full composting container is pulled out from below the bathroom. - Seal and Compost:
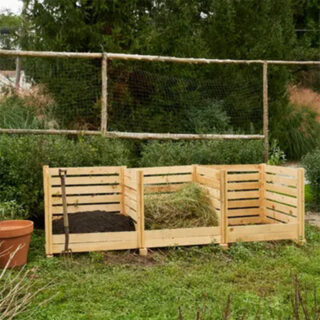
The full container is sealed with the provided closed lid and left outside to undergo the further composting process. - Replace with Empty Container:
The empty or emptied spare container is then put into use, replacing the full container. This ensures that the toilet can continue to be used immediately without any downtime.
The entire servicing process can be completed in a matter of minutes without requiring any tools, making it easy and convenient for users.
Common Questions
1. How Do You Know When the Container Is Full?
To check if the composting container is full, we recommend looking into the composting chamber from above through the porcelain pedestal using a torchlight. Shine the light directly into the composting container to check the level of solid waste. If the waste is reaching the top of the container, it’s time for servicing.
Many users worry about the direct view into the composting chamber through the pedestal. However, it’s important to note that without a torchlight, there is no clear visibility into the composting container because the chamber is dark inside. Unless you actively shine a light into the chamber, you won’t see anything from the bathroom. This design helps maintain discretion and comfort for users.
2. How Do You Know If the Solid Waste Is Ready with Composting?
The full container should remain outside for at least 3 to 4 months if the climate is warm. In colder climates, such as the northern parts of the US, where winters are cold, the composting process will take longer—at least 6 to 12 months.
- Example 1: Spring Service
If the full container is removed in March, you can expect the compost to be ready by late October, as it has undergone the composting process during the warmer spring and summer months. - Example 2: Autumn Service
If the full container is removed in October, it is unlikely that the compost will be ready by March, as it would have experienced cold winter temperatures. In this case, the container should sit idle for at least 12 months to ensure it has gone through at least one warm period.
For warmer southern climates, where temperatures remain higher throughout the year, the composting process is significantly faster, and the container may be ready within 3 to 4 months.
3. How Do You Know When the Compost Is Ready?
We recommend trusting your own senses. Ready compost does not resemble toilet waste—it has a uniform, earthy appearance and no unpleasant odor. If the material looks and smells like regular soil, it is likely ready for use. Composting is a natural process, so if your senses tell you the compost is ready, it probably is.
1. Can I throw toilet paper into the composting container of the GL 55?
Yes, you can safely dispose of toilet paper in the GL 55. Just avoid using any paper products containing plastic, as these will not compost and should be placed in a separate bin.
2. How do I know when the composting container is full?
To check if the composting container is full, shine a torchlight into the composting chamber through the porcelain pedestal. If the solid waste is reaching the top of the container, it’s time for servicing.
Don’t worry about accidental visibility of the waste—without a torchlight, the chamber is too dark to see anything from above, ensuring discretion and comfort.
3. How do I know if the solid waste in the full container is ready with composting?
The full container should sit outside for at least:
- 3 to 4 months in warm climates.
- 6 to 12 months in colder climates, such as the northern US.
For example:
- If the container is removed in spring (e.g., March), the compost is typically ready by late October after the warm spring and summer months.
- If the container is removed in autumn (e.g., October), it will likely not be ready by March due to the cold winter. Instead, it should sit until the following autumn to ensure proper composting.
4. How do I know when the compost is ready?
We recommend trusting your senses:
- Appearance: The compost should no longer resemble toilet waste. It will look like uniform, earthy material.
- Smell: Properly composted material will have no unpleasant odor and may even have an earthy, soil-like smell.
If it looks and smells like regular soil, it’s ready to use!
5. How often do I need to empty the composting container of the GL 55, and how quickly does it fill up?
The frequency of emptying depends on the number of users and usage:
- The GL 55 comfortably supports 1-2 people full-time or 2-3 people part-time.
- For weekend-only use, it can support 4-5 people.
If the system is used by more people than its capacity, consider purchasing an additional spare container or upgrading to a system with a larger capacity.
6. How much space is required below the floor for installation of the GL 55?
The GL 55 requires a minimum clearance of 550mm (21.6 inches) below the floor to accommodate the composting container. This makes it one of the most compact split-system composting toilets on the market.
If you don’t have sufficient underfloor space, consider our self-contained waterless toilets as an alternative.
Not Seeing Your Question?
Let us hear it! There are others probably pondering the same thing.
📱 (702) 328 0689
✉ info@waterlesstoiletshop.com
Specifications
| Feature | Specification |
|---|---|
| Product | GL 55 |
| Recommended For | Cabins, Tiny Homes, Weekend Homes, and many more use cases. |
| Capacity | 1-2 People Full-Time, 4-5 People Weekend Use |
| Average Daily Visits | – |
| Length | – |
| Width | 17.7″ |
| Height | 20.5″ |
| Depth | 17.7″ |
| Minimum Under Floor Space Requirement | 21.7″ |
| Volume Per Container | 14.5 Gallons |
| Container Weight (Empty) | – |
| Toilet Weight | ~60 lbs |
| Total System Shipping Weight | – |
Delivery Contents
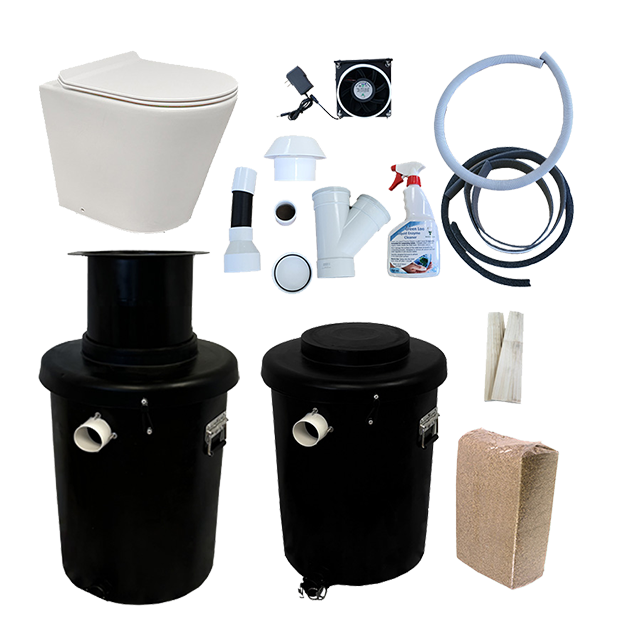
- White porcelain pedestal, non-separating, incl. soft-close seat and fixtures
- GL 55 composting container with a waste chute (21.6″)
- GL 55 Spare composting container with a closed lid
- Electrical duct fan
- Ventilation pipe fittings*
- Excess liquids drainage hose & fittings*
- Liquid enzyme cleaner
- Hemp dry material bale
- Instructions for installation and use
*To finish installation, you will need to source ventilation pipes from your local hardware store. Alternatively, you may purchase a ventilation pipe package separately from us.
Optional accessories
*We recommend considering the purchase of a replacement fan along with your toilet, so you’ll have one on hand in case the original fan eventually needs replacing after year(s) of use.
GL 55
The GL 55 is the smallest and most affordable split-system batch composting toilet on the market, making it an ideal choice for tiny homes, cabins, and weekenders. With its sleek porcelain pedestal, this waterless toilet combines functionality and style, fitting seamlessly into any off-grid bathroom.
The system efficiently separates excess liquid at the base of the composting containers using a unique capillary tray design. This tray not only absorbs some of the liquid back into the compost, enhancing the composting process, but also minimizes maintenance by reducing the amount of liquid that needs to be managed. This advanced feature sets the GL 55 apart from urine-diverting toilets, offering a simpler and more streamlined solution for composting waste.
Perfect for Off-Grid and Sustainable Living
As a completely waterless toilet, the GL 55 requires no plumbing or chemicals, making it an environmentally friendly option for off-grid living. Its power-efficient 12V fan ensures odorless operation, and for locations without electricity, the system can be paired with a solar setup or a whirlybird ventilation system, offering total off-grid functionality.
The GL 55 is designed to feel as close as possible to a regular toilet, providing users with a familiar and comfortable experience. Waste falls directly into one of the composting containers located below the floor level, where the system efficiently separates excess liquid from solid waste using its capillary tray. This batch composting method ensures the toilet can be used continuously without interruption, as one container can be used while the other finishes the composting process.
To maintain an optimal composting environment, we recommend occasionally adding bulking materials such as hemp bedding, coconut coir, or peat moss. This can be done after each use when solids are deposited or in a larger amount once a week, depending on your preference.
Common Questions About Use
- How do I keep the porcelain pedestal clean?
The GL 55’s porcelain pedestal is designed to minimize contact with waste due to its shape and the natural anatomy of the user, meaning stains or marks are extremely rare. For cleaning, you can use a toilet brush and a small amount of water, such as from a spray bottle, just as you would with a regular flush toilet. - Can I throw toilet paper into the toilet?
Yes, standard toilet paper can be safely added to the composting container. Avoid using any paper products that contain plastic, as these will not compost and should be placed in a separate bin. - Does the toilet smell?
No, the GL 55 is completely odorless. This is achieved through its advanced design, which separates liquids from solids and uses a ventilation system that creates constant underpressure in the composting unit. Air is drawn up and out through the ventilation pipe, ensuring no unpleasant odors escape into the bathroom at any time. This is a key feature that addresses one of the most common concerns people have about composting toilets.
Installation of the GL 55 Composting Toilet
The GL 55 offers two main installation and servicing options, allowing for flexibility based on your bathroom setup and preferences. The composting containers are installed directly below the toilet pedestal, requiring a minimum underfloor clearance of 550mm (21.6 inches).
Installation Options:
- Option 1: Pull Out the Entire Container with the Waste Shaft and Lid
In this setup, the entire composting container is removed for servicing, including the lid and waste shaft. This method is ideal for spaces with more clearance and offers easy access for cleaning and maintenance.
- Option 2: Pull Out Just the Container
With this option, the waste shaft and lid remain in place, and only the composting container is removed for servicing. This method is more compact and is generally the more common choice, as it minimizes disturbance to the overall system.
Both options allow for straightforward installation and servicing of the GL 55, ensuring long-term ease of use.
Note: The above installation photos are of the larger GL 90 system, but the same applies to the GL 55 as well.
Additional Installation Details:
- Ventilation: The system includes a 12V, 3-watt fan and vent fittings to maintain airflow and eliminate odors. For off-grid setups, the ventilation system can be paired with a solar-powered fan or a whirlybird. Please note that the standard delivery package does not include the rigid 4″ vent pipes.
- Drainage: Excess liquids are efficiently handled through a drainage hose, which can be directed to an appropriate disposal area such as a gravel pit.
The GL 55 is shipped with comprehensive installation instructions and all necessary components, ensuring a smooth setup process for any handyman or DIY enthusiast. The only product component you need to acquire from your local hardware store is the rigid vent pipes that are not part of the standard delivery package as every installation requires different lengths of vent pipes.
When the GL 55 composting container is full of solid waste, servicing the system is a quick and straightforward process:
- Remove the Full Container:
The full composting container is pulled out from below the bathroom. - Seal and Compost:
The full container is sealed with the provided closed lid and left outside to undergo the further composting process. - Replace with Empty Container:
The empty or emptied spare container is then put into use, replacing the full container. This ensures that the toilet can continue to be used immediately without any downtime.
The entire servicing process can be completed in a matter of minutes without requiring any tools, making it easy and convenient for users.
Common Questions
1. How Do You Know When the Container Is Full?
To check if the composting container is full, we recommend looking into the composting chamber from above through the porcelain pedestal using a torchlight. Shine the light directly into the composting container to check the level of solid waste. If the waste is reaching the top of the container, it’s time for servicing.
Many users worry about the direct view into the composting chamber through the pedestal. However, it’s important to note that without a torchlight, there is no clear visibility into the composting container because the chamber is dark inside. Unless you actively shine a light into the chamber, you won’t see anything from the bathroom. This design helps maintain discretion and comfort for users.
2. How Do You Know If the Solid Waste Is Ready with Composting?
The full container should remain outside for at least 3 to 4 months if the climate is warm. In colder climates, such as the northern parts of the US, where winters are cold, the composting process will take longer—at least 6 to 12 months.
- Example 1: Spring Service
If the full container is removed in March, you can expect the compost to be ready by late October, as it has undergone the composting process during the warmer spring and summer months. - Example 2: Autumn Service
If the full container is removed in October, it is unlikely that the compost will be ready by March, as it would have experienced cold winter temperatures. In this case, the container should sit idle for at least 12 months to ensure it has gone through at least one warm period.
For warmer southern climates, where temperatures remain higher throughout the year, the composting process is significantly faster, and the container may be ready within 3 to 4 months.
3. How Do You Know When the Compost Is Ready?
We recommend trusting your own senses. Ready compost does not resemble toilet waste—it has a uniform, earthy appearance and no unpleasant odor. If the material looks and smells like regular soil, it is likely ready for use. Composting is a natural process, so if your senses tell you the compost is ready, it probably is.
1. Can I throw toilet paper into the composting container of the GL 55?
Yes, you can safely dispose of toilet paper in the GL 55. Just avoid using any paper products containing plastic, as these will not compost and should be placed in a separate bin.
2. How do I know when the composting container is full?
To check if the composting container is full, shine a torchlight into the composting chamber through the porcelain pedestal. If the solid waste is reaching the top of the container, it’s time for servicing.
Don’t worry about accidental visibility of the waste—without a torchlight, the chamber is too dark to see anything from above, ensuring discretion and comfort.
3. How do I know if the solid waste in the full container is ready with composting?
The full container should sit outside for at least:
- 3 to 4 months in warm climates.
- 6 to 12 months in colder climates, such as the northern US.
For example:
- If the container is removed in spring (e.g., March), the compost is typically ready by late October after the warm spring and summer months.
- If the container is removed in autumn (e.g., October), it will likely not be ready by March due to the cold winter. Instead, it should sit until the following autumn to ensure proper composting.
4. How do I know when the compost is ready?
We recommend trusting your senses:
- Appearance: The compost should no longer resemble toilet waste. It will look like uniform, earthy material.
- Smell: Properly composted material will have no unpleasant odor and may even have an earthy, soil-like smell.
If it looks and smells like regular soil, it’s ready to use!
5. How often do I need to empty the composting container of the GL 55, and how quickly does it fill up?
The frequency of emptying depends on the number of users and usage:
- The GL 55 comfortably supports 1-2 people full-time or 2-3 people part-time.
- For weekend-only use, it can support 4-5 people.
If the system is used by more people than its capacity, consider purchasing an additional spare container or upgrading to a system with a larger capacity.
6. How much space is required below the floor for installation of the GL 55?
The GL 55 requires a minimum clearance of 550mm (21.6 inches) below the floor to accommodate the composting container. This makes it one of the most compact split-system composting toilets on the market.
If you don’t have sufficient underfloor space, consider our self-contained waterless toilets as an alternative.
Not Seeing Your Question?
Let us hear it! There are others probably pondering the same thing.
📱 (702) 328 0689
✉ info@waterlesstoiletshop.com
Specifications
| Feature | Specification |
|---|---|
| Product | GL 55 |
| Recommended For | Cabins, Tiny Homes, Weekend Homes, and many more use cases. |
| Capacity | 1-2 People Full-Time, 4-5 People Weekend Use |
| Average Daily Visits | – |
| Length | – |
| Width | 17.7″ |
| Height | 20.5″ |
| Depth | 17.7″ |
| Minimum Under Floor Space Requirement | 21.7″ |
| Volume Per Container | 14.5 Gallons |
| Container Weight (Empty) | – |
| Toilet Weight | ~60 lbs |
| Total System Shipping Weight | – |
Delivery Contents

- White porcelain pedestal, non-separating, incl. soft-close seat and fixtures
- GL 55 composting container with a waste chute (21.6″)
- GL 55 Spare composting container with a closed lid
- Electrical duct fan
- Ventilation pipe fittings*
- Excess liquids drainage hose & fittings*
- Liquid enzyme cleaner
- Hemp dry material bale
- Instructions for installation and use
*To finish installation, you will need to source ventilation pipes from your local hardware store. Alternatively, you may purchase a ventilation pipe package separately from us.
Optional accessories
*We recommend considering the purchase of a replacement fan along with your toilet, so you’ll have one on hand in case the original fan eventually needs replacing after year(s) of use.
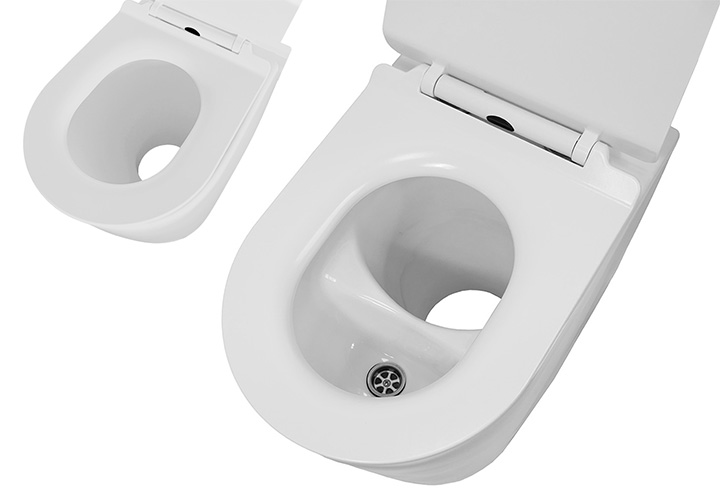
Option: Upgrade to Urine-Separating Porcelain Pedestal
By default, all our split-system composting toilets, including the GL 55, come with a high-quality non-separating porcelain pedestal. For those who prefer, we offer the option to upgrade to a urine-diverting porcelain pedestal. This design separates urine from solids at the the toilet seat, reducing odors and need for additional bulking agents. For more information, have a look at our Urine-Diverting Porcelain Toilet Pedestal.

