No Plumbing, No Problem: How Scott Installed the GL 90 at His Kentucky Cabin
When Scott of the YouTube channel Bluegrass State of Mind started planning the bathroom situation for his off-grid cabin in Kentucky, he knew a traditional toilet was out of the question. No plumbing, no sewer connection — just a beautiful piece of land where he and his partner spend their weekends. What he needed was something compact, practical, and built to last.
After researching his options, Scott landed on the Green Loo GL 90 batch composting toilet, ordered through Waterless Toilet Shop. Then he did what he does best: he documented the entire installation process on video for his community to learn from.
Why the GL 90?
Scott didn’t arrive at the GL 90 without doing his homework. His first instinct was an incinerator toilet — until he saw the price tags. Units run anywhere from $3,500 to $5,000 before shipping or accessories, and they rely on mechanical parts that can fail over time. That ruled them out fast.
Standard composting toilets were the next option, but most are large, bulky units that take up significant space inside the cabin. For Scott’s tiny off-grid getaway, that wasn’t going to work either.
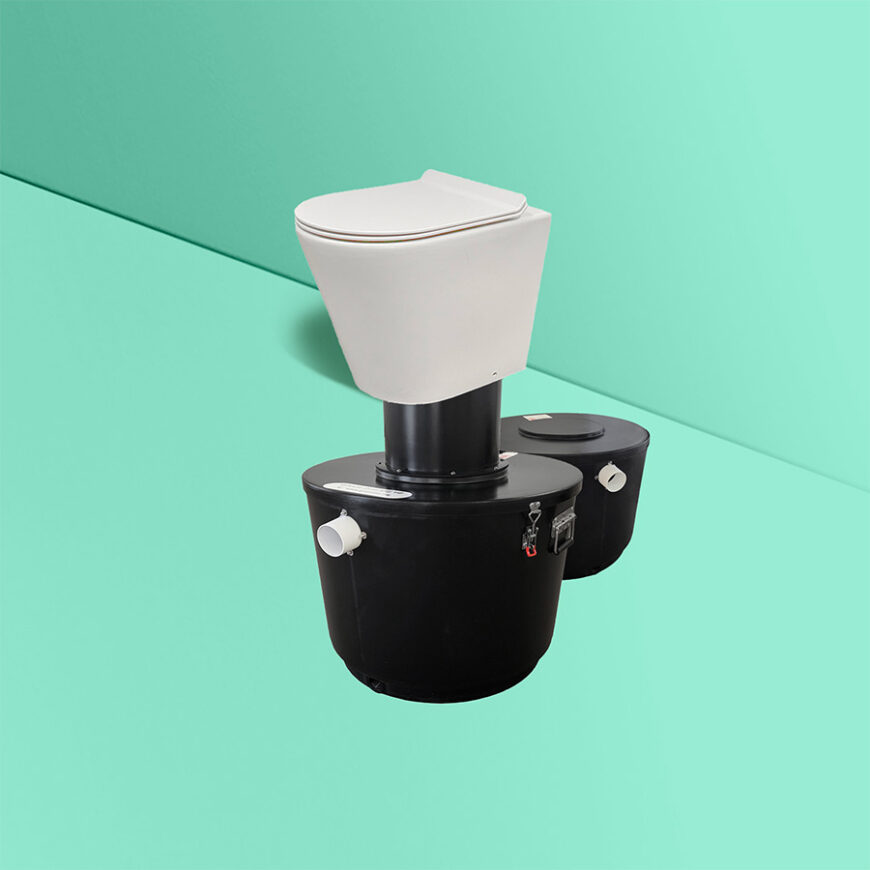
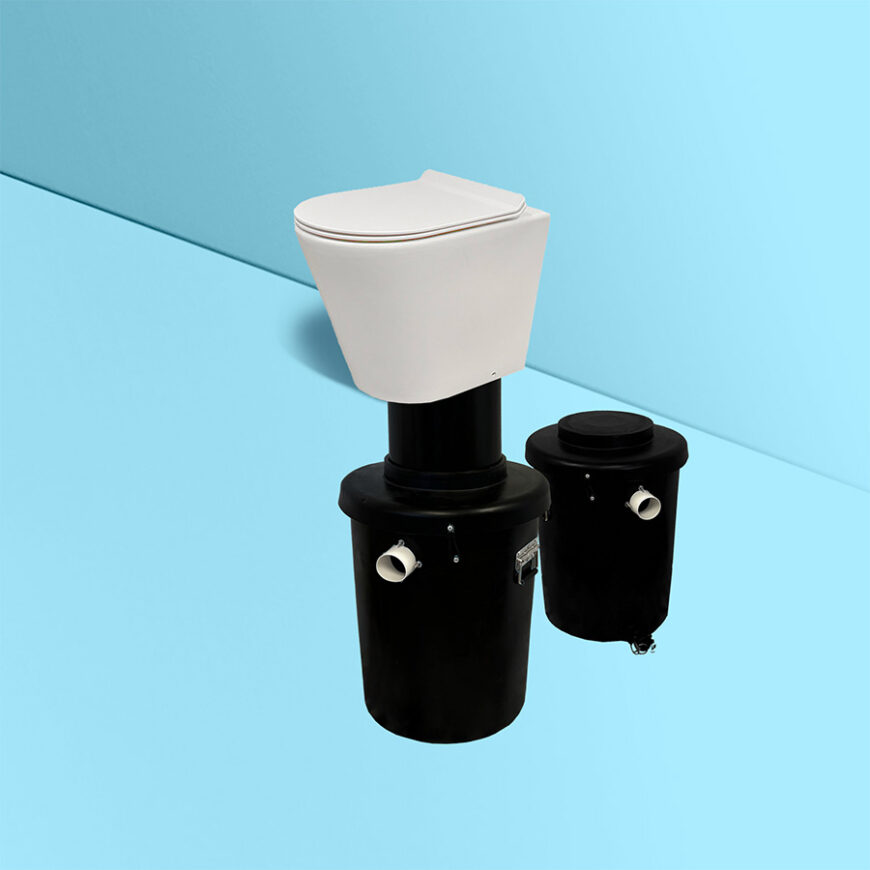
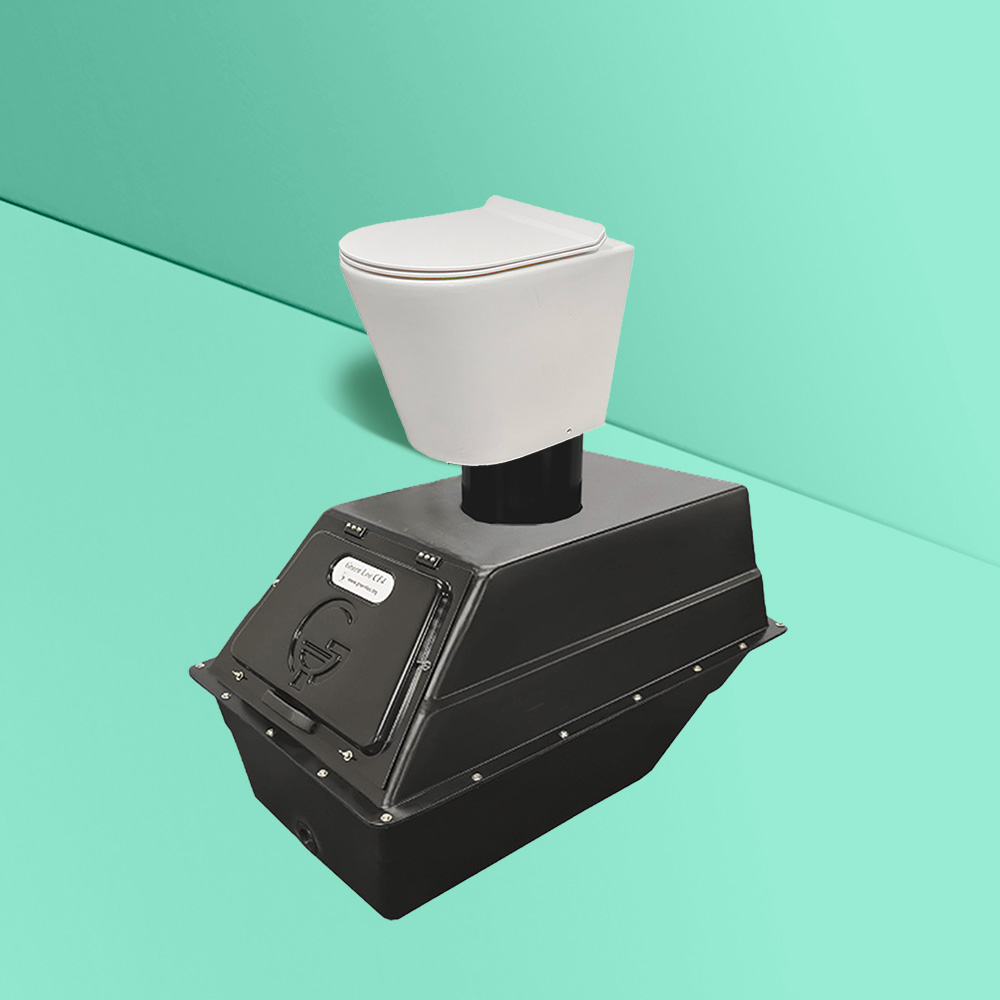
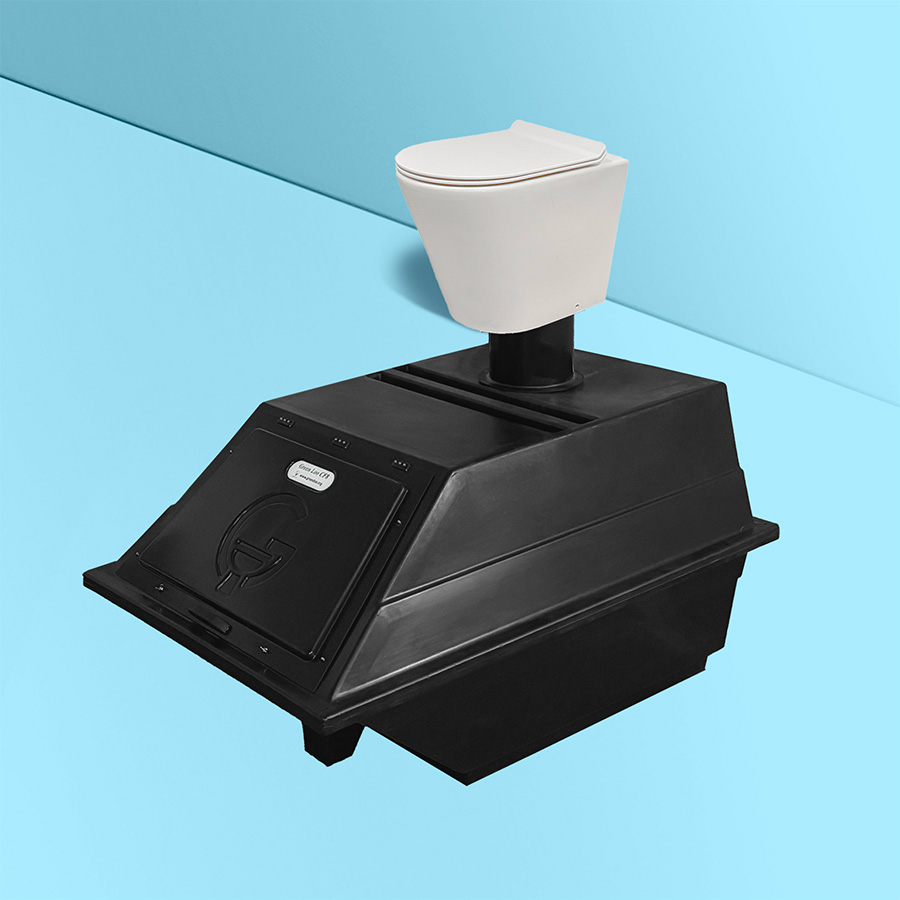
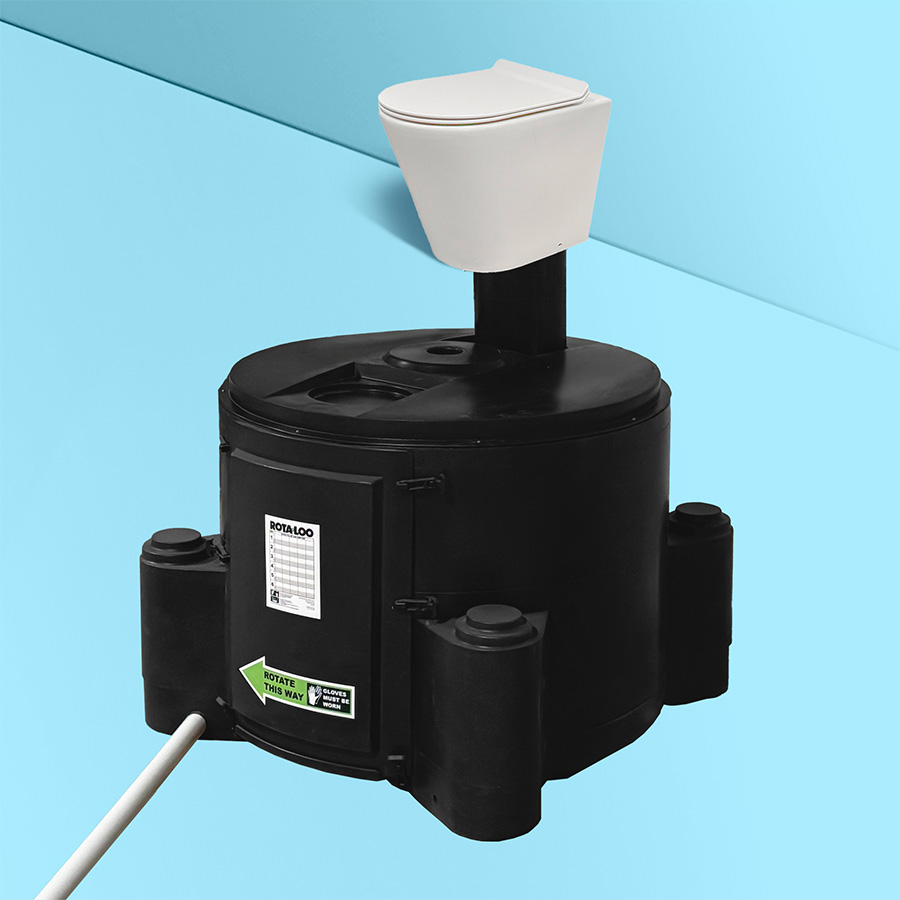
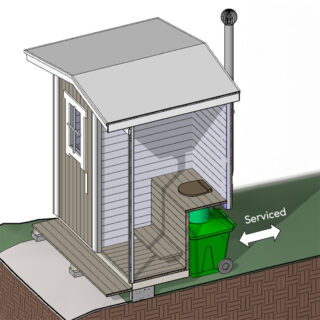
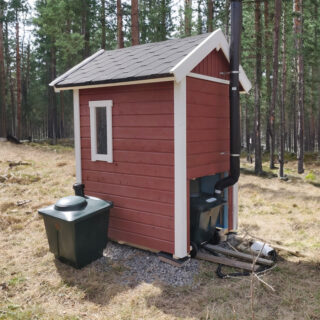
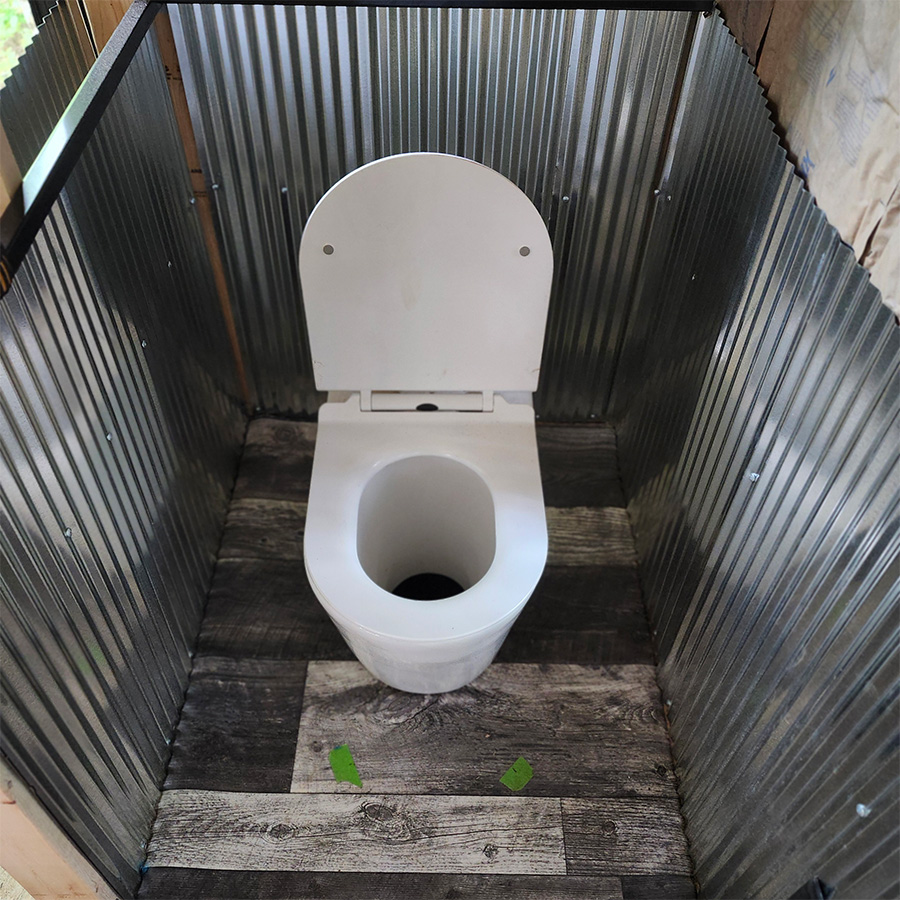
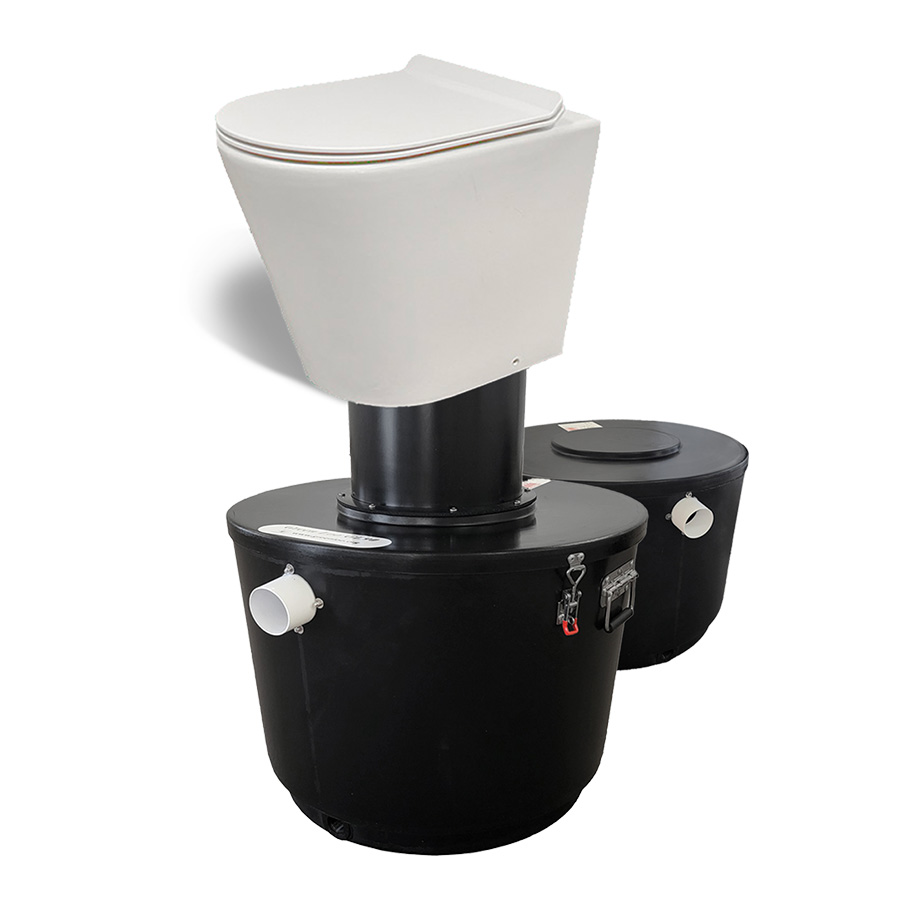
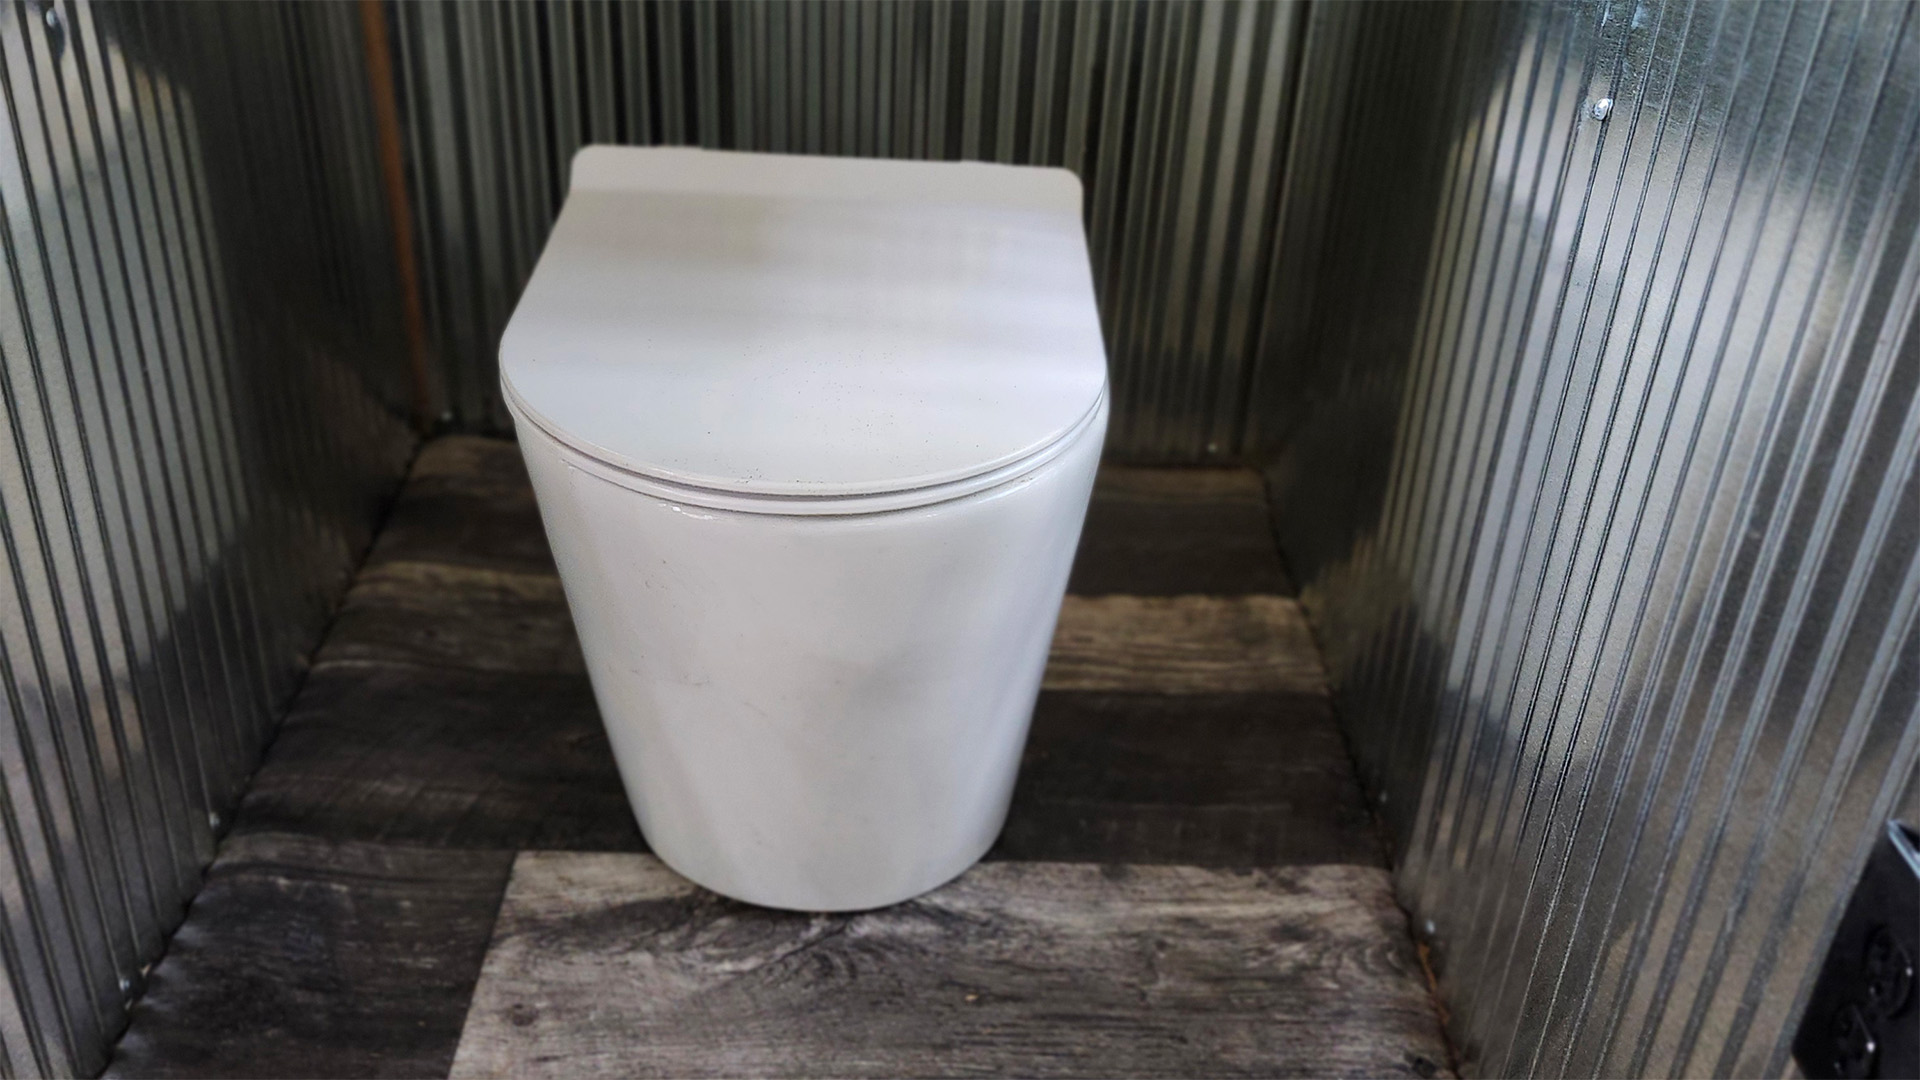
The GL 90 solved both problems. The porcelain pedestal sits above floor level — that’s the only part you ever see inside the cabin. Everything else: the collection containers, the vent system, the overflow — lives below the floor. For Scott, that was the deciding factor.
“This is going to be the only thing that’s above floor level in our cabin. It’s all you’re going to see. Everything else will be below the floor.”
The GL 90 is rated for 2–3 people in permanent use, or 4–6 people for weekend use. For Scott and his partner visiting a couple of weekends a month, he estimated the container could realistically last six months or more before needing to be swapped.
What Comes in the Box
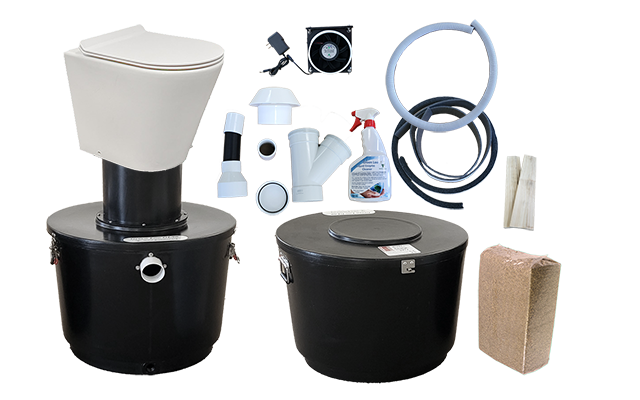
The GL 90 typically ships in three boxes and includes everything you need to get started — with just two exceptions Scott had to source locally:
- 4-inch schedule 40 PVC pipe (10 feet was enough for Scott’s installation)
- Pipe hangers to mount the vent pipe to the exterior wall
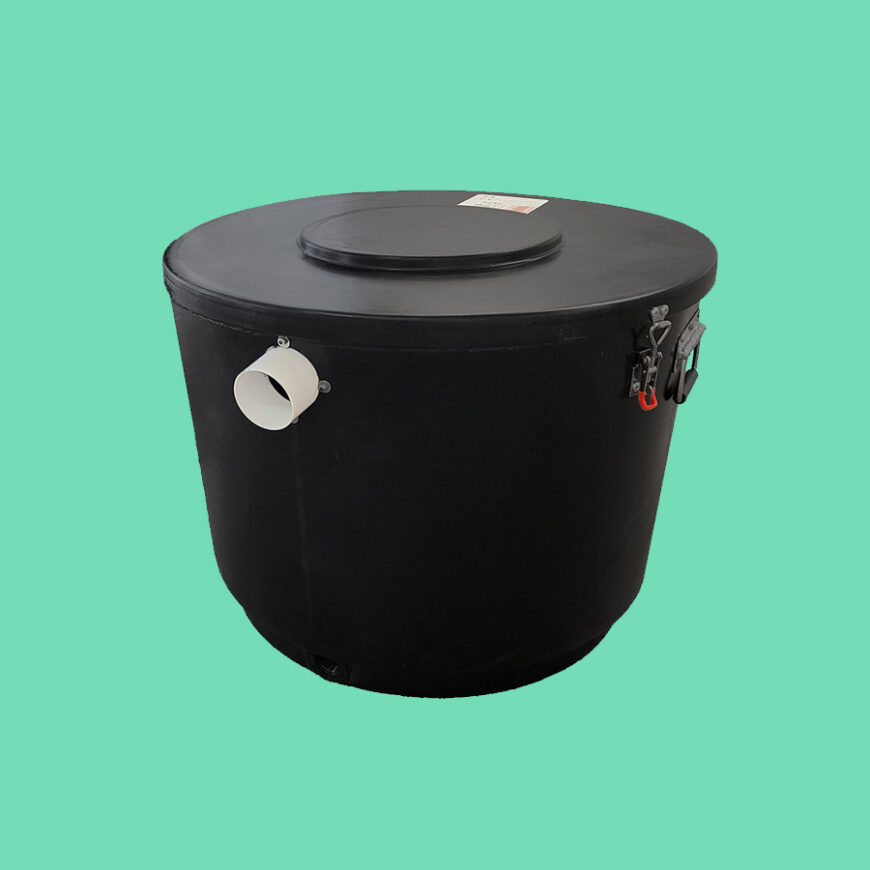
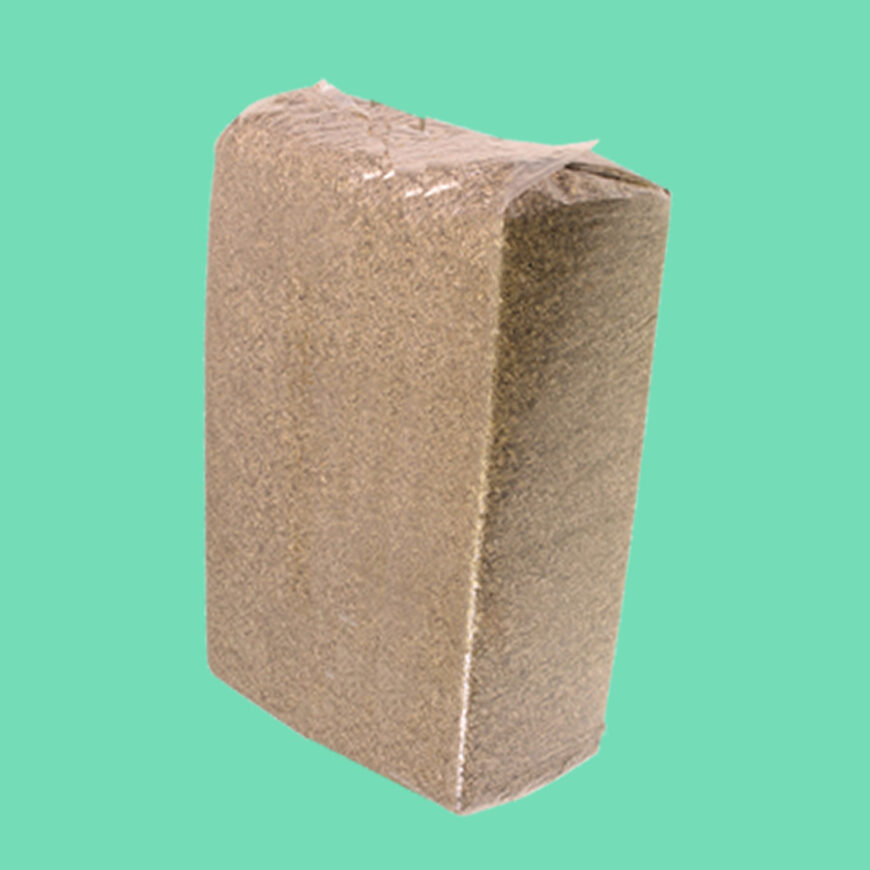
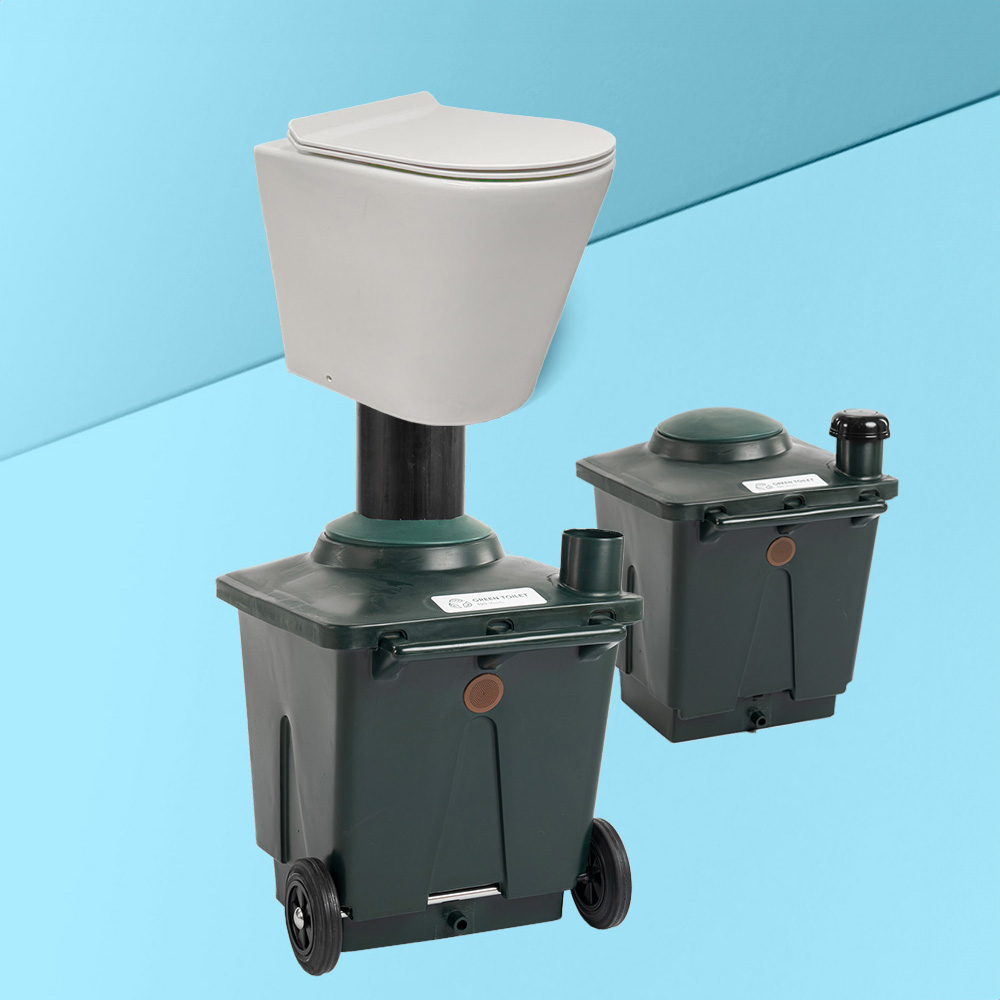
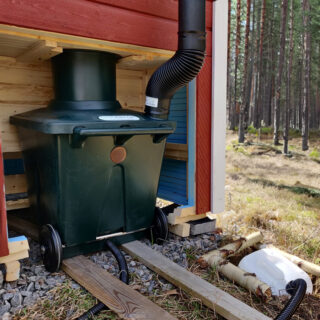
Everything else is included: the two 90-liter collection containers, the porcelain pedestal, toilet seat, waste chute, vent fan, rubber fittings to connect metric Australian fittings to US standard pipe, hemp shavings for the first layer, an enzyme-based cleaner, and all hardware.
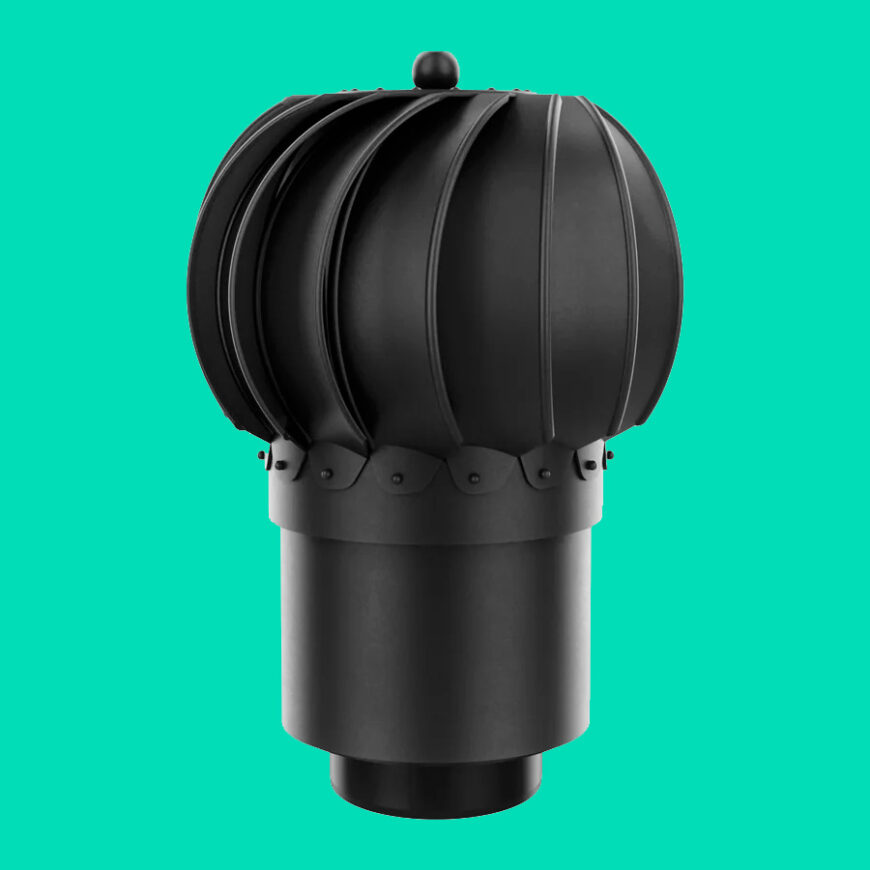
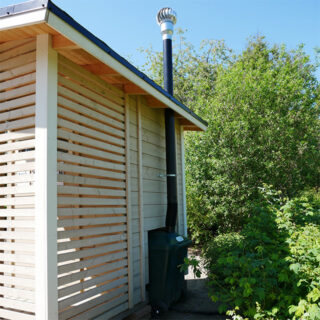
Scott also added two optional extras he purchased separately: a manual whirlybird for the vent cap (for airflow on still days when the fan battery might be low) and a solar panel and battery pack to power the 12V fan.
The Installation
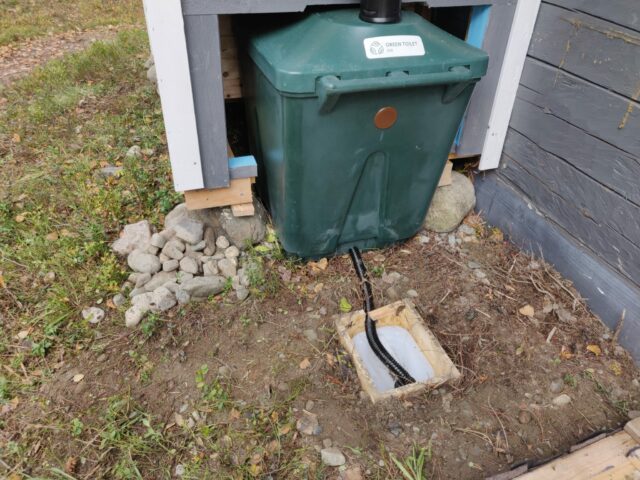
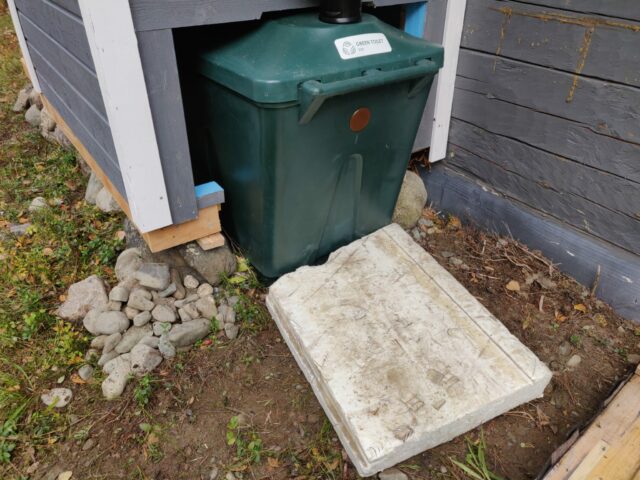
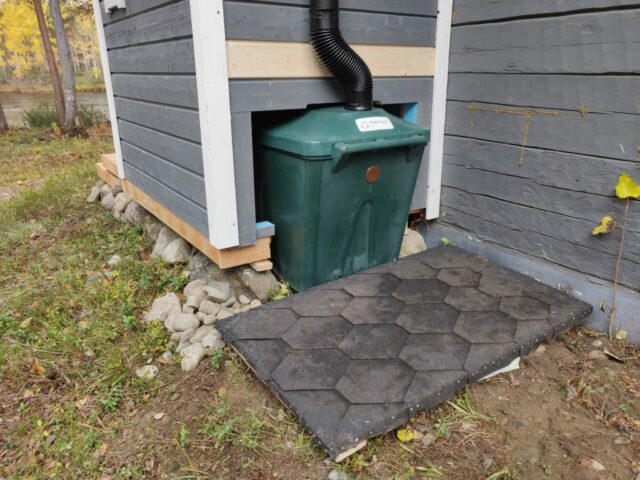
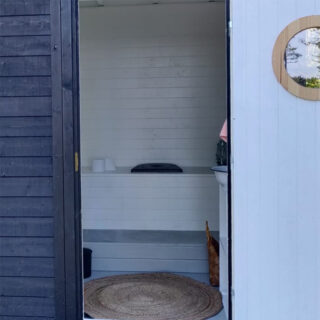
Scott’s cabin already had a dedicated bathroom space, which made the location decision straightforward. He chose a spot close to the exterior wall to keep maintenance as simple as possible.
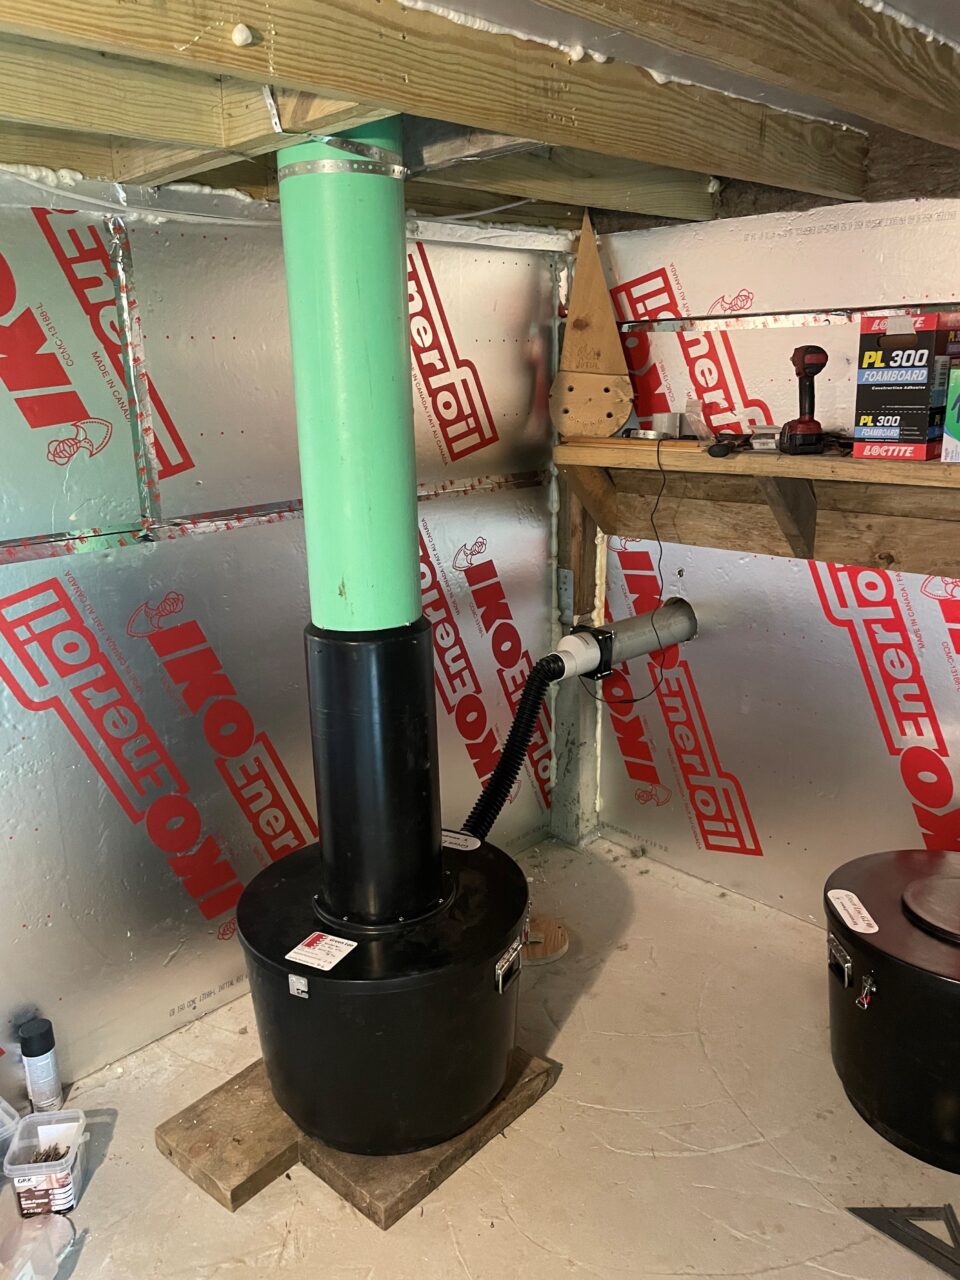
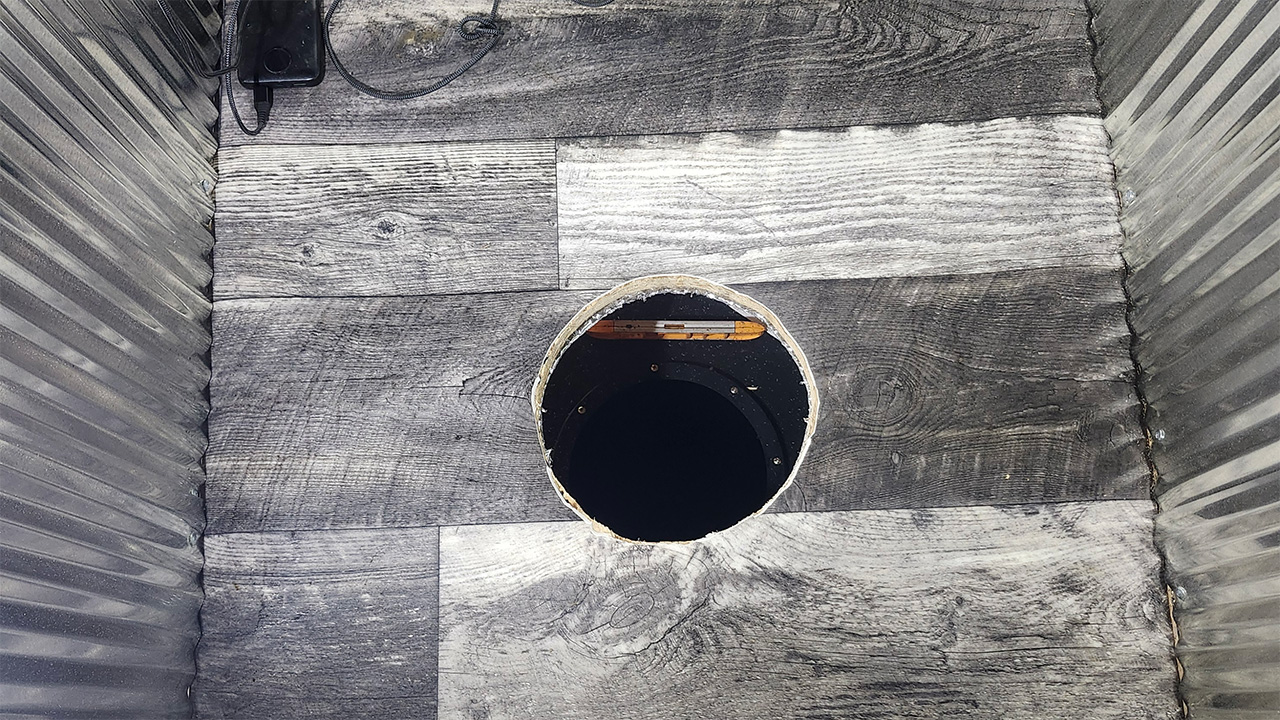
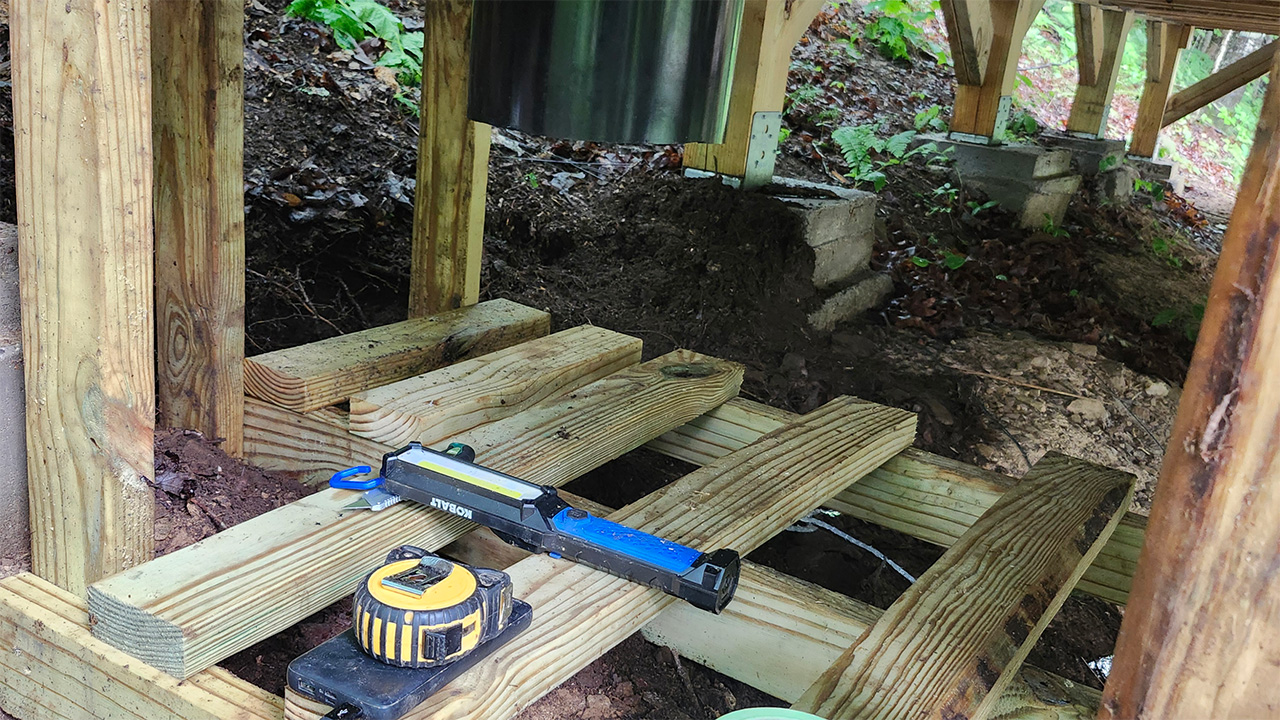
Cutting the floor hole
With the subfloor still bare — an advantage he made the most of — Scott located his floor joists, marked the center point, and cut a 9.8-inch diameter hole for the waste chute. His advice: cut tight. It’s much easier to work a hole slightly larger than to deal with one that’s too big.
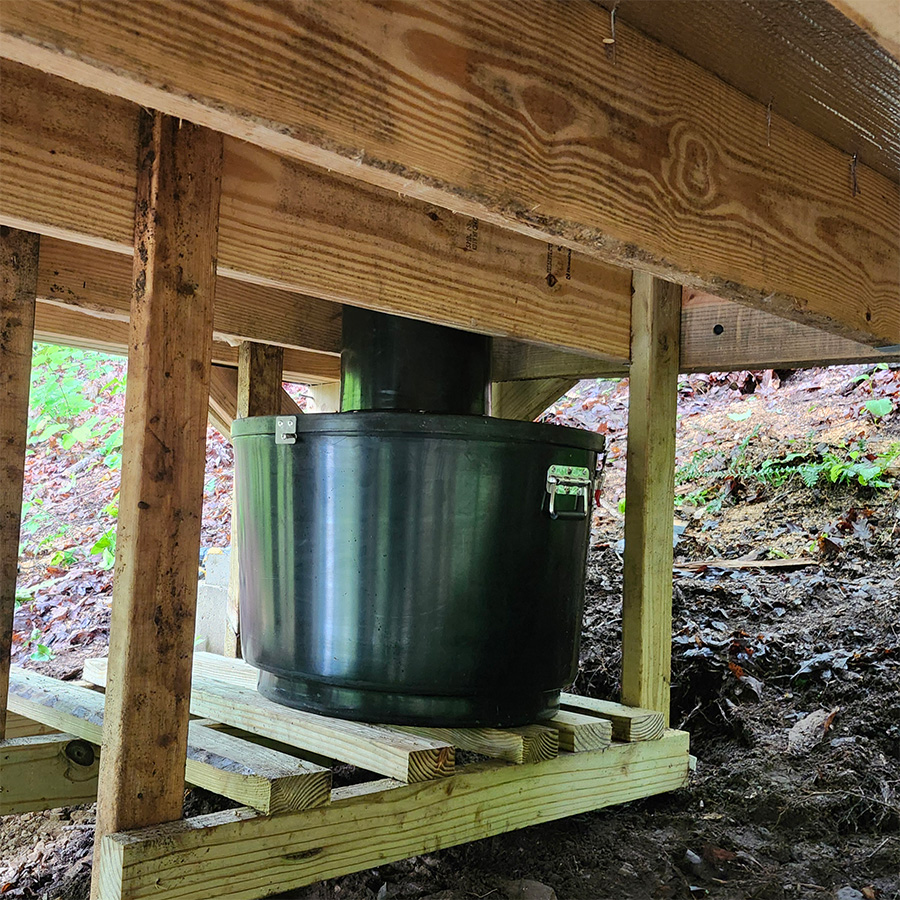
Building the container shelf
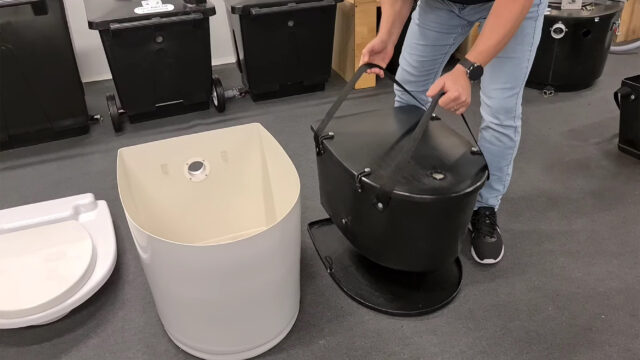
Rather than digging out a level spot in the ground, Scott built a simple timber shelf suspended from the floor joists below the cabin. This gave him a solid, level platform for the containers and made it easy to slide them in and out when the time comes to switch. The key measurement: from the top of the shelf to the underside of the floor joists, he kept 23 inches — 18 inches for the container itself, leaving 5 inches of clearance to slide the lid up and down the chute during a container swap.
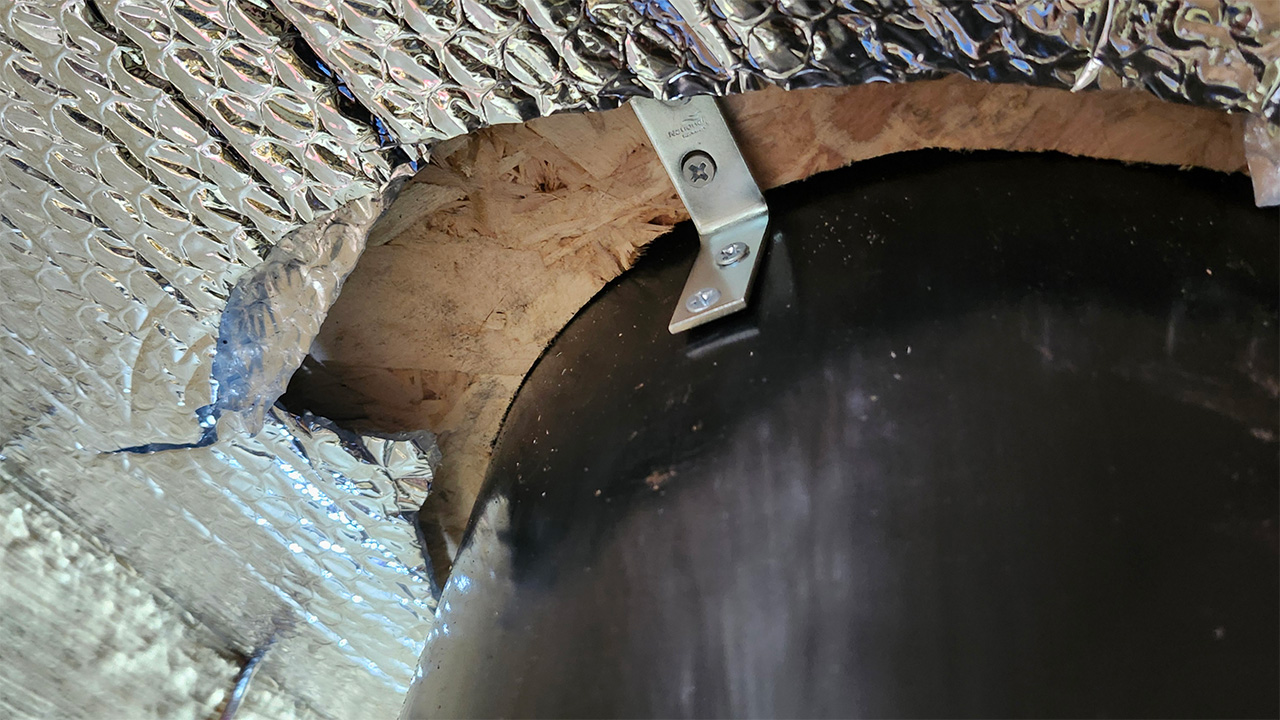
Setting the waste chute
The chute sits 1.6 inches (about 1⅝ inches) proud of the finished floor. Scott cut it carefully, checked it was level from multiple angles, and secured it with angle brackets and adhesive. One honest note from Scott: he had to trim the corners off the mounting brackets to fit them around the chute.
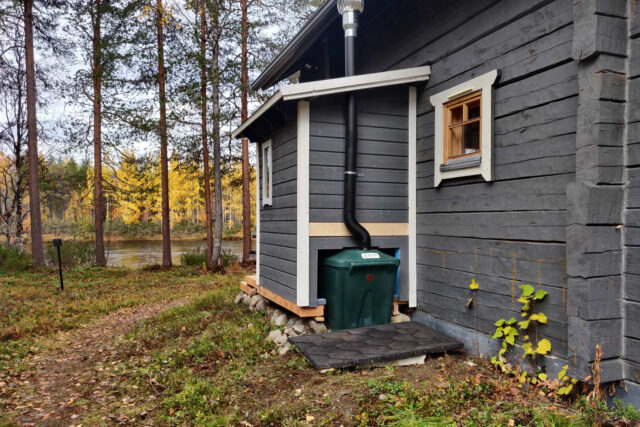
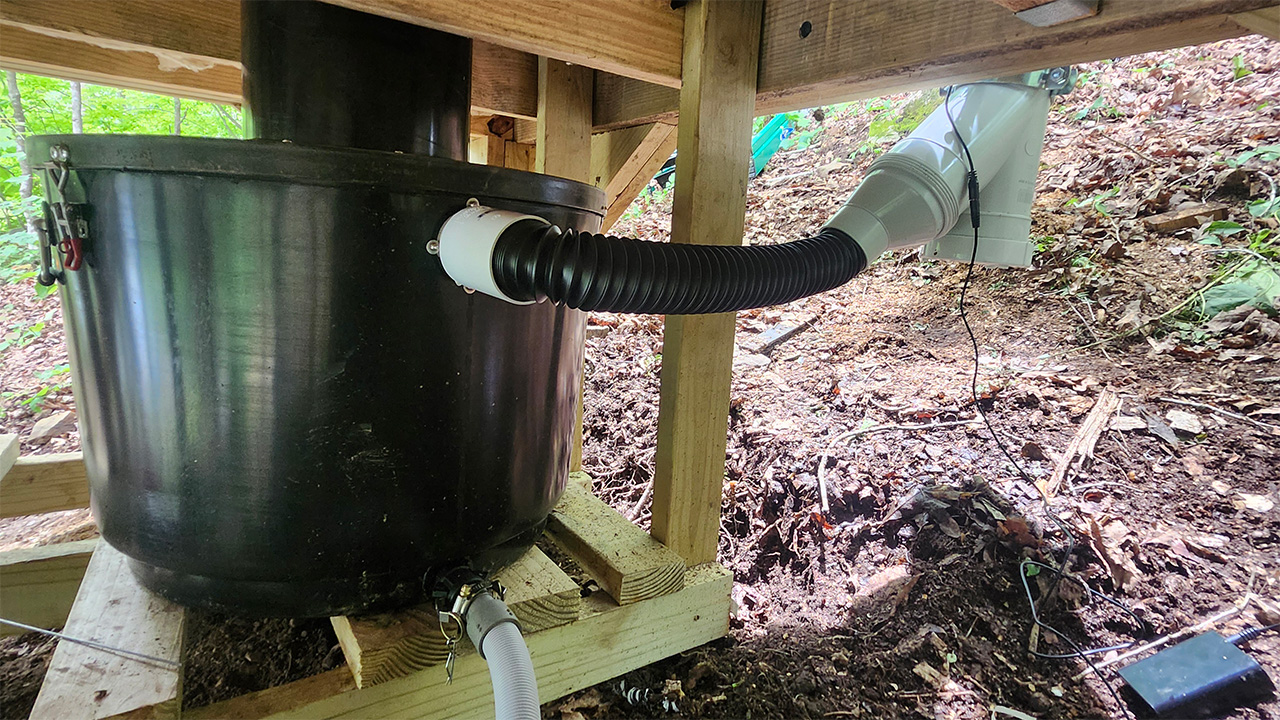
Vent system
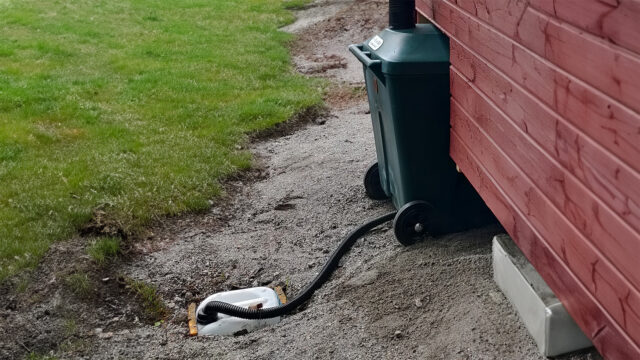
The vent runs 4-inch schedule 40 PVC from the Y-connector at the container, up through the exterior wall, and at least 2 feet above the roofline. Scott used standoff brackets to keep the pipe away from the siding, which also made routing it through the eave cleaner. The 12V fan mounts in the vent line and pulls air up and out — ensuring the system stays odor-free inside the cabin.
First use
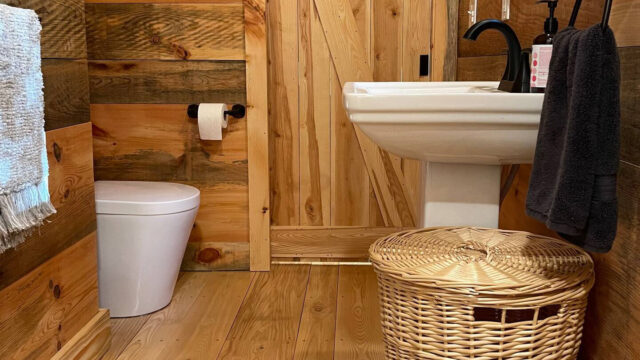
Once everything was in place, Scott added the hemp shavings to cover the false bottom, locked the container in, and the system was ready. The soft-close toilet seat was, in his words, a nice bonus.
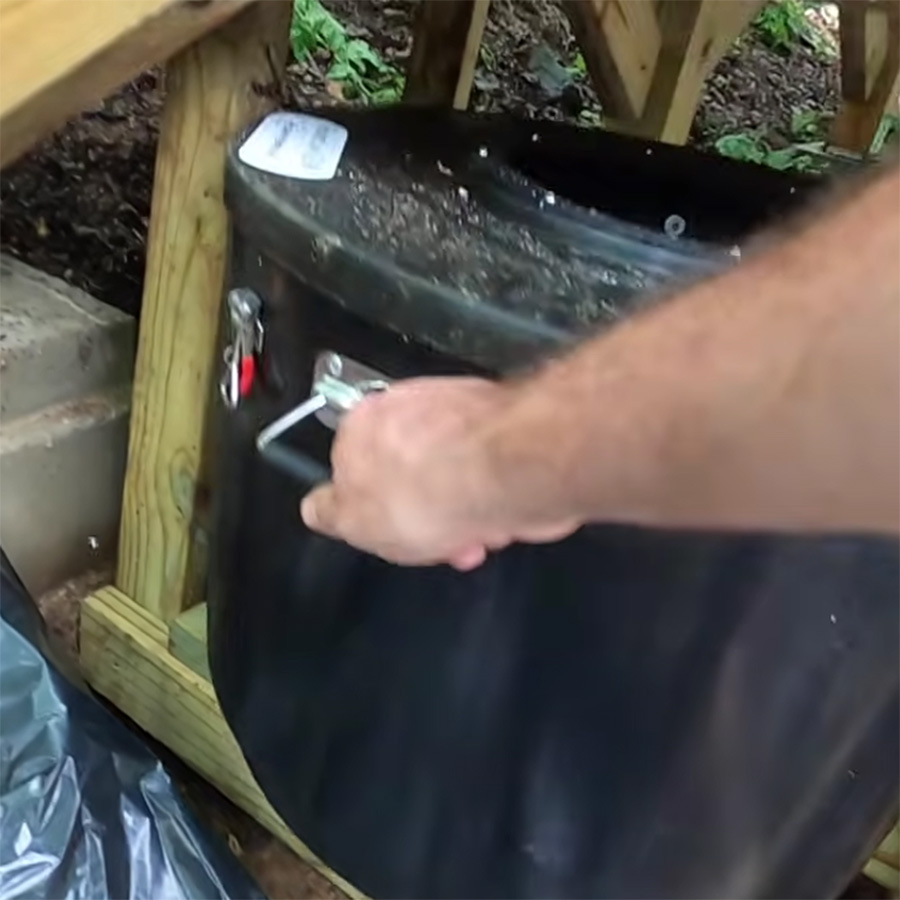
Container Swaps: Easier Than You’d Think
One of the most common questions people have about batch composting toilets is how the container change works in practice. Scott walked through it clearly:
When the active container is full, you slide the lid up the waste chute, pull the container out, put the solid lid on it (to continue composting in place), and slide in the fresh empty container. Hook the lid back down, reconnect the vent and overflow hose, and you’re done. Scott estimated the whole process takes about 20 minutes.
The genius of the batch system is that you always have a container ready to go — no gaps, no mess, no scramble to deal with unfinished compost.
First Impressions
Scott wrapped up his installation video with a simple verdict:
“I really feel good about this system. So far, first impressions — we love it. Mainly because it’s so compact inside your cabin. That’s literally all you have to deal with inside here.”
He also gave a nod to the support experience along the way. Before installation, he had around five questions he wasn’t sure about after reading the manual — and every single one was answered by Waterless Toilet Shop the same day or the next morning.
Key Takeaways
- Capacity: 2–3 people permanent use / 4–6 people weekend use
- Above-floor footprint: The porcelain pedestal only — everything else goes below
- Two containers included: Always have a fresh one ready; no downtime during swaps
- Container swap time: Around 20 minutes
- Minimum underfloor clearance needed: 18 inches (Installation Option 1) or more (Option 2)
- What to source separately: 4-inch schedule 40 PVC pipe and pipe hangers
Watch the Full Installation Video
Scott’s full 72-minute installation walkthrough is available on his YouTube channel, Bluegrass State of Mind. It covers every step in detail — from unboxing to first use — and is one of the most thorough GL-90 installation guides available anywhere.
Thinking about the GL 90 for your own cabin, off-grid home, or outhouse? Browse the GL 90 on our website or reach out — we’re happy to answer any questions before you order.